Viola’s Sheppards Pie

IMG_0310

While making supper Friday I snapped some pictures with my iPhone.  I thought I would share with you this version of my mom’s shepherds pie 🙂 Traditionally the topping is mashed potatoes but to mix things up a bit my mom decided to slice thin potatoes and just cook them that way with butter and salt and pepper.

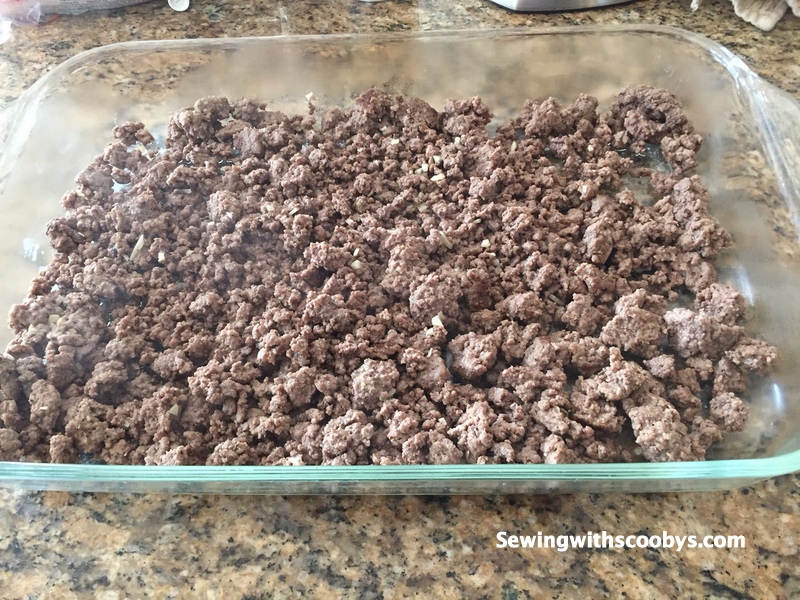
First off cook 1 1/2 pounds of ground beef with salt and pepper to taste with 1 clove of garlic (or 2 if you really like garlic) finely minced.

IMG_0297

I got so caught up in my potatoes I forgot to get a shot of the corn! I know corn is so exciting lol.

corn 57735d70-0944-4907-be2d-32754ce3aafb

Take a can of cream corn and layer that on top of your ground beef along with two cans of regular corn and spread that layer even as well. This brings a lot of moisture to the dish as well as flavor. Who doesn’t like corn right?

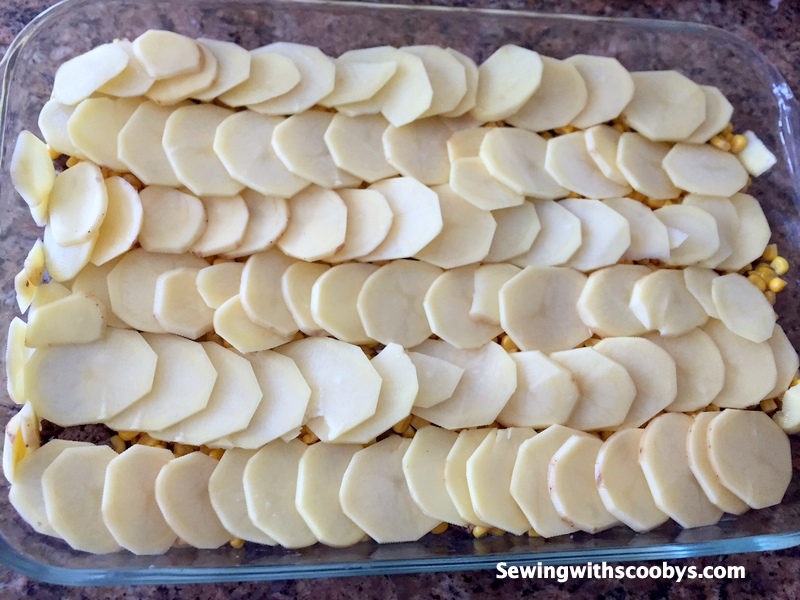
Next take 4 potatoes or so (mine are puny so I have a few more) and roughly peel them. Now slice them into thin slices. This is where I break out my mandoline to make short work of this process 🙂

IMG_0299-001 IMG_0301

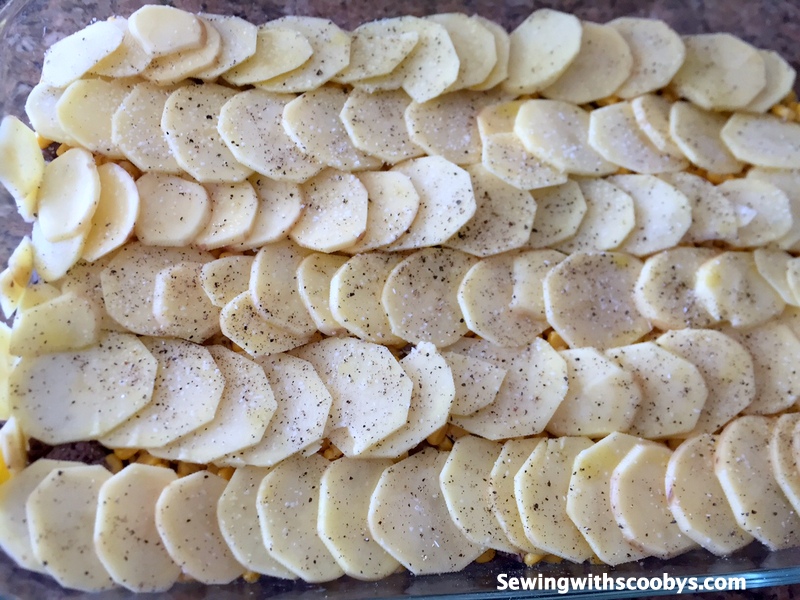
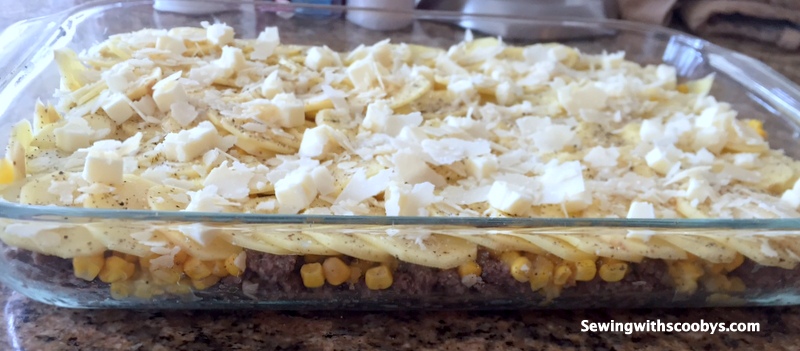
Layer your finely sliced potatoes on top of the corn layer and sprinkle with salt and pepper and a drizzle of EVOO

IMG_0302-001 IMG_0303

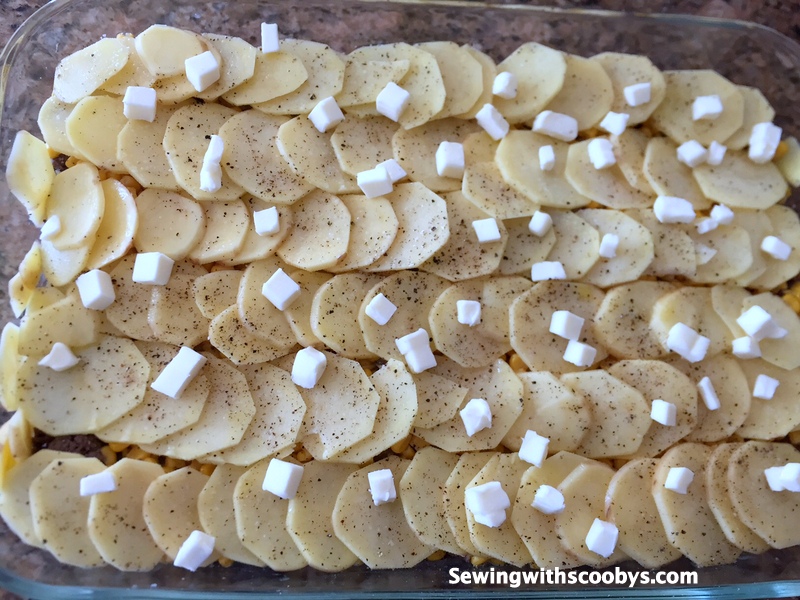
Hmm because I’m french I need to add butter right here!

IMG_0304

and cheese…..(flakes of Parmigiano-Reggiano)

IMG_0305 IMG_0306

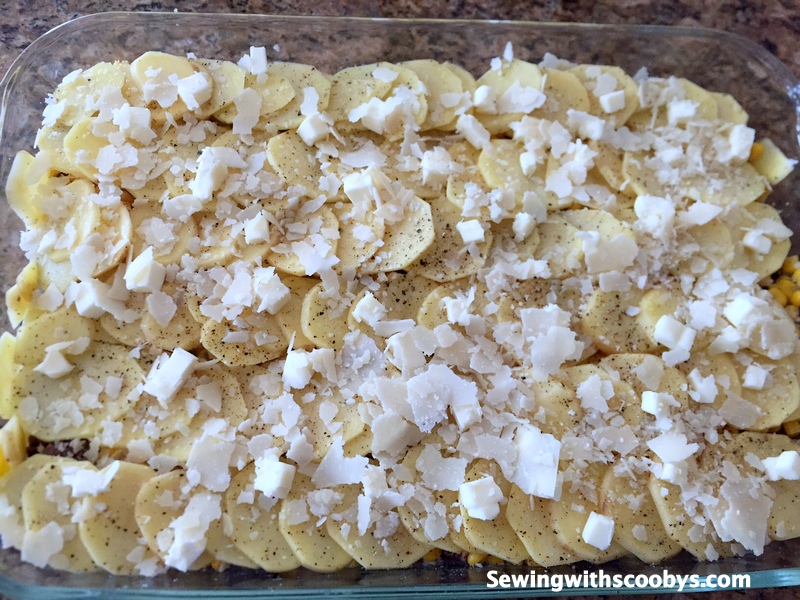
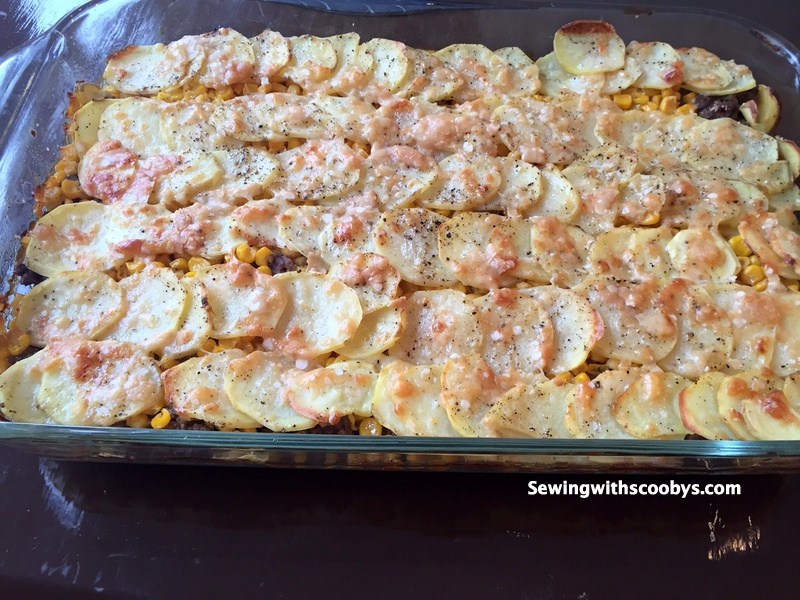
Ok into a 425 Degree oven it goes for 40-45 minutes till the potatoes are tender.

Voila:

IMG_0310

I served this with a nice light herb salad with fresh tomatoes

IMG_0311IMG_0312

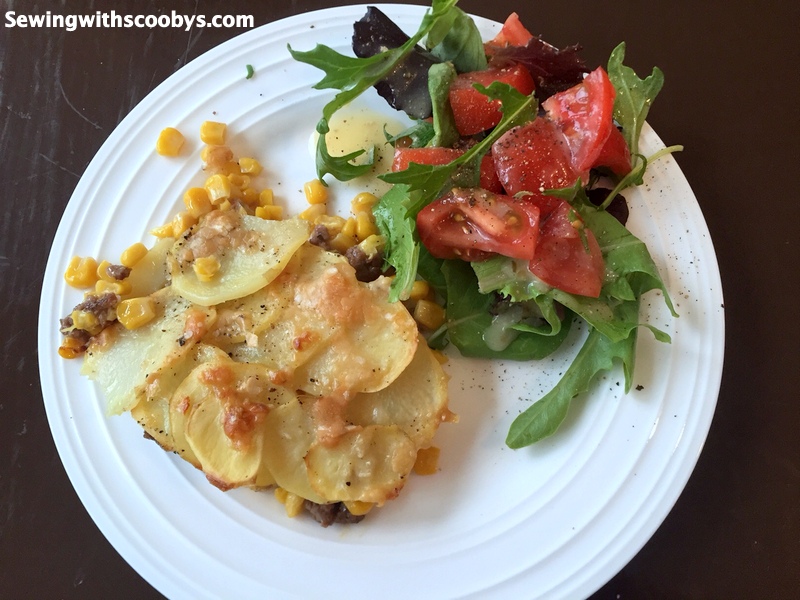
Bon Appetite! This is so easy to make and delicious I hope you guys try it out 🙂

Viola's Sheppards Pie

  • Servings: 6-8
  • Difficulty: easy
  • Print

Ingredients:

  • 1 1/2 pounds of ground beef
  • salt and pepper to taste
  • 1-2 cloves of garlic minced.
  • 1 can of cream corn
  • 2 cans of regular corn
  • 4 medium size potatoes
  • 1 tbsp of EVOO
  • 4 tablespoons of butter cut up in pieces
  • 1/2 cup of Parmigiano-Reggiano cheese

Directions:

Preheat the oven to 425 degrees. In a large skillet brown your ground beef with salt and pepper to taste, along with your garlic. Layer this into a 9X12 pan.  Layer the cream corn next then the 2 cans of regular corn.

Roughly peel your potatoes and slice thinly.  Layer this on top of the corn add your salt, pepper, EVOO, butter and cheese.

Place in oven for 40-45 min (till potatoes are fork tender) Let cool for 10 min and enjoy!


Skirt Sloper Completed! Yay!!

DSC_4064

Turns out the easy fix for the drag lines (I mentioned this sloper at the end of this post) was just to move over the darts towards the side by 1 inch. This smoothed everything out. Muslin does not stretch well on the cross grain and I was thinking of adding 1/8 inch to the side seams because there seems to be some tightness at the hip causing faint drag lines but my teacher said that fashion fabric usually has more give on the cross grain and it should lay nicely. So I am ready to transfer my custom sloper to tag!! I am so excited!!

DSC_4036 DSC_4037 DSC_4038 DSC_4039

So excited in fact that I could not resist a sale at Jo-Annes and bought some summery prints to make some skirts along with some lining.  Now I get to draft an actual custom designed skirt and play with real fabric!!

DSC_4064

Here is my sloper on tag nice and sturdy for hopefully many years of drafting/sewing fun 🙂

DSC_4066 DSC_4067

So the first thing I did was follow along with my skirt course and I used my sloper base to make a high waisted pencil skirt with a flounce. It is flirty and fun, hopefully still appropriate for my age :/

DSC_4082 DSC_4083

The first time sewing it up and trying it on I had to shave more off the high waist band, 1/4 inch blending to nothing at the original waist. I also had to shave off 1/8 inch around hips on the side seams. This is what I have so far. ……I am very undecided about the length of the hem??? Please let me know if you think it looks ok at this length or should I lengthen/shorten it??

DSC_4084 DSC_4085 DSC_4086

How to Make Continuous Bias Strips

First cut off a 1/2 yard straight piece of fabric. Unfold it so you have your selvedge edges on either end of the long strip. Fold one corner till it is even with the bottom of your rectangle, you will cut here on the fold. Now you are left with this:

DSC_4027

Next take your triangle selvedge edge and place with the selvedge edge on the other side, the shape will look like this:

DSC_4028

Sew these right sides together and press open your seams. Next you will draw lines parallel to the slanted edges of your fabric on the wrong side. Decide how thick you need your strips of bias to be. I have thick rope so I used 2 inch lines. The long straight top and bottom will be a seam so I marked off 1/4 inch seam allowances, this will help you match up your lines later.

DSC_4029

Next you will need to bring your long edges together starting with the first parallel line you drew (on your long edge) meeting up with the second parallel line you drew at the edge on the bottom. IF THEY ARE NOT STAGGERED THEN YOU WILL JUST BE CUTTING OUT USELESS RINGS OF FABRIC.  Ask me how I know this? LOL

DSC_4030

So you see you have a twisted mobious looking tube here. It will have tails of fabric on either end because we staggered the lines. It looks all screwed up I know but just trust me and go sew your seam.  Press it open using a pressing sleeve.

Now comes the moment of truth! Take your scissors and start at one end cutting through a single layer of fabric round and round through your yards of bias strips.

DSC_4033

Ta da you did it!

DSC_4034

Now you can make bias tape, or piping, trim etc.

Cats to Cushions

DIY Chair Cushions

Thought I would share with you some pictures of my redecorating journey.  As you all know I moved to California 3 years ago from Pittsburgh.  Recently my husband and I decided we will be staying put here in California for quite sometime (most likely permanently).

So my Victorian red decor was just not working in my spanish style mediterranean house that has all white walls. We are just renting at the moment so I have no desire to paint.  To purge the old Pittsburgh and embrace our new life here I decided to decorate my place with a beach theme.

Here are a few pics of what I have done so far. I am bringing in blue hues, especially aqua which happens to be my favorite color!

DSC_4043

This whale is so cute!!!

DSC_4053

Octopus cast iron pot holder for my kitchen.

DSC_4041 DSC_4042 DSC_4047DSC_4049 DSC_4050 DSC_4051 DSC_4052

So getting to the title of this post….see these wicker covered dining room chairs?

DSC_4048

I recently got rid of the chair cushions and gave them away as they didn’t go with my color scheme and wicker is perfect for beach theme!! My chairs already have a blue distressed finish on them along with my new dining room rug this room is done!! Or is it? Turns out wicker is the perfect scratch pad!!

DSC_4040

My little lion 🙂

AHHHHHHH so either the cat gets declawed (450 dollars) or I make new chair cushions (75 dollars to make all 6, or 20 bucks a pop to buy decent new ones!) hmmm which one would you choose lol. My kitty occasionally gets outside so I would hate for her to not have her nails if she so needed them.

I sent my husband this picture from Jo-Annes and asked him which fabric he liked.

IMG_0264

We choose this fabric, along with yards and yards of rope to make piping, also I will be doing covered buttons, I already had some white cotton fabric to make the piping for these cushions. I have 6 to make ugh! This will take precious time away from my drafting courses. lol

DSC_4023

But look I put the courses to good use already. I made a template of my chair seat and turned that into a pattern complete with notches, awl punches and grainlines lol.

DSC_4024

First off I made yards and yards of my own bias tape and turned that into piping.  I will make a post of how I did that soon. I also made the tie backs for the chairs. This material is an indoor outdoor polyester, thick canvas material. It has been treated for sunlight and stains and is quite stiff. What was I thinking I could turn these little tubes! HA I think not! So I just folded in the raw edges and sewed close to the fold on one side.

DSC_4035DSC_4054

So I cut out one cushion I used 1 1/2 inch seam allowance and it was way too roomy. There is always so much anticipation before turning a project right!

DSC_4056 DSC_4057 DSC_4058

My template also needed 1/4 inch shaved off to get that perfect fit. I then changed my seam allowances on the fabric to 3/4 inch. I have 1 inch thick pile batting for the cushions. I also changed my placement for the ties in the back of the chair they were a bit too spread out.

DSC_4060 DSC_4061 DSC_4062

After those changes I am satisfied with the fit! I started to add the covered buttons too! One cushion down 5 more to go lol

PS  did I ever mention I hate hand sewing??? 4 buttons per cushion and closing the hole where I turned them ugh!

DSC_4063


Better Oatmeal

I have been slacking in the kitchen soooo bad!!! Thought I would give a few tips for adding some punches of flavor and texture to your morning oatmeal.

First off I love the large flake oatmeal not instant or minute. Why? Texture and health reasons. You can go for steel-cut oatmeal too but it takes sooooo long to cook and I am damn hungry 😉 The hardier the grain the healthier it is.  The more natural foods are, the longer it will take for your body to break it down; this is also known as low glycemic index foods. Great for diabetics!! The longer it takes to digest the longer we feel full and satisfied and won’t snack in-between meals. Also if our guts have to work so much to break down all this hardy goodness then our metabolism increases and burns more calories!! Yay! Ok I know boring science food nutrition garbage! Lets get on to the good stuff!!

Here I have 1 serving of milk I heated up with a bit of orange zest till it started to boil then plop in your serving of oatmeal and let it simmer till it is cooked.

IMG_0279

Off heat I added a few drops of vanilla, few sprinkles of cinnamon and mixed that up.

IMG_0280

Put that in a bowl, now comes the not so healthy part but hey you counteracted that with the whole grains right??? Drizzle a bit of maple syrup on it and because I am french a dollop of butter!! Ahhhhh.

IMG_0281IMG_0282

Ok what am I missing?? Lets get a bit of crunch going on in this bowl…. slivered almond, pecan bits, walnuts or this:

IMG_0283 IMG_0284

Take a spoon and dig in!!

IMG_0285

And I took some pics of some latte art me and my hubby enjoyed the day before 🙂

IMG_0276 IMG_0277