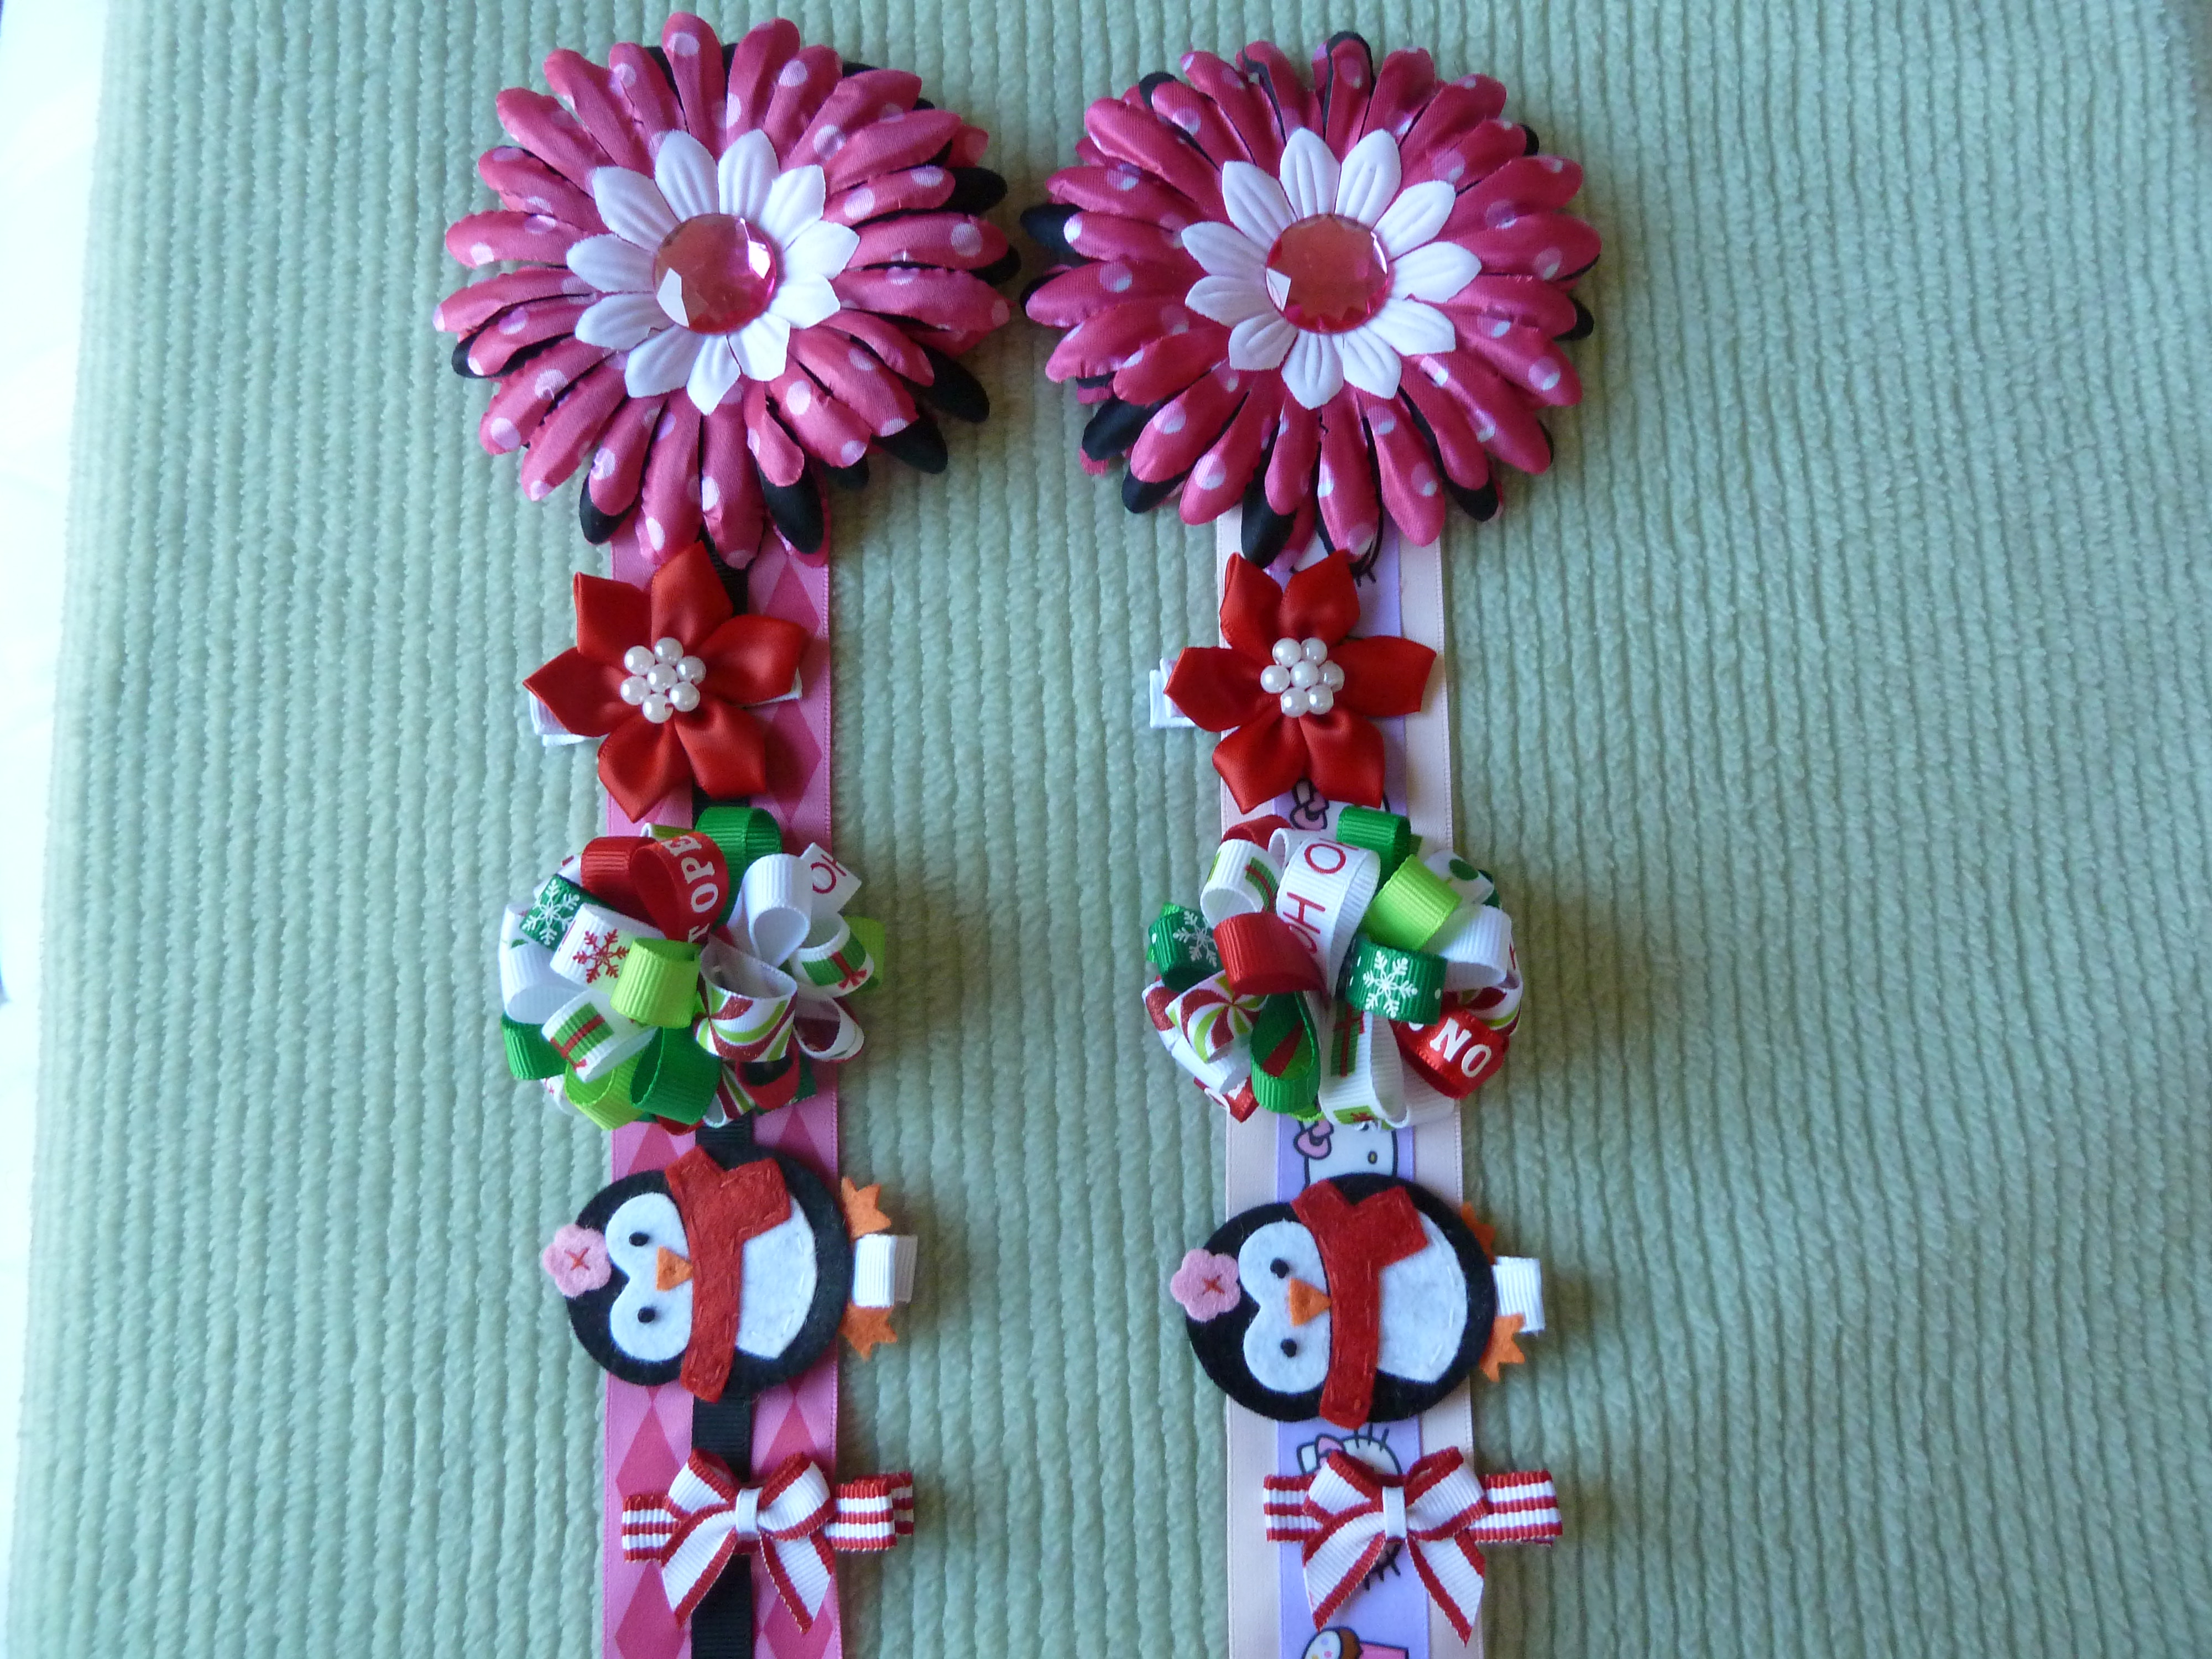
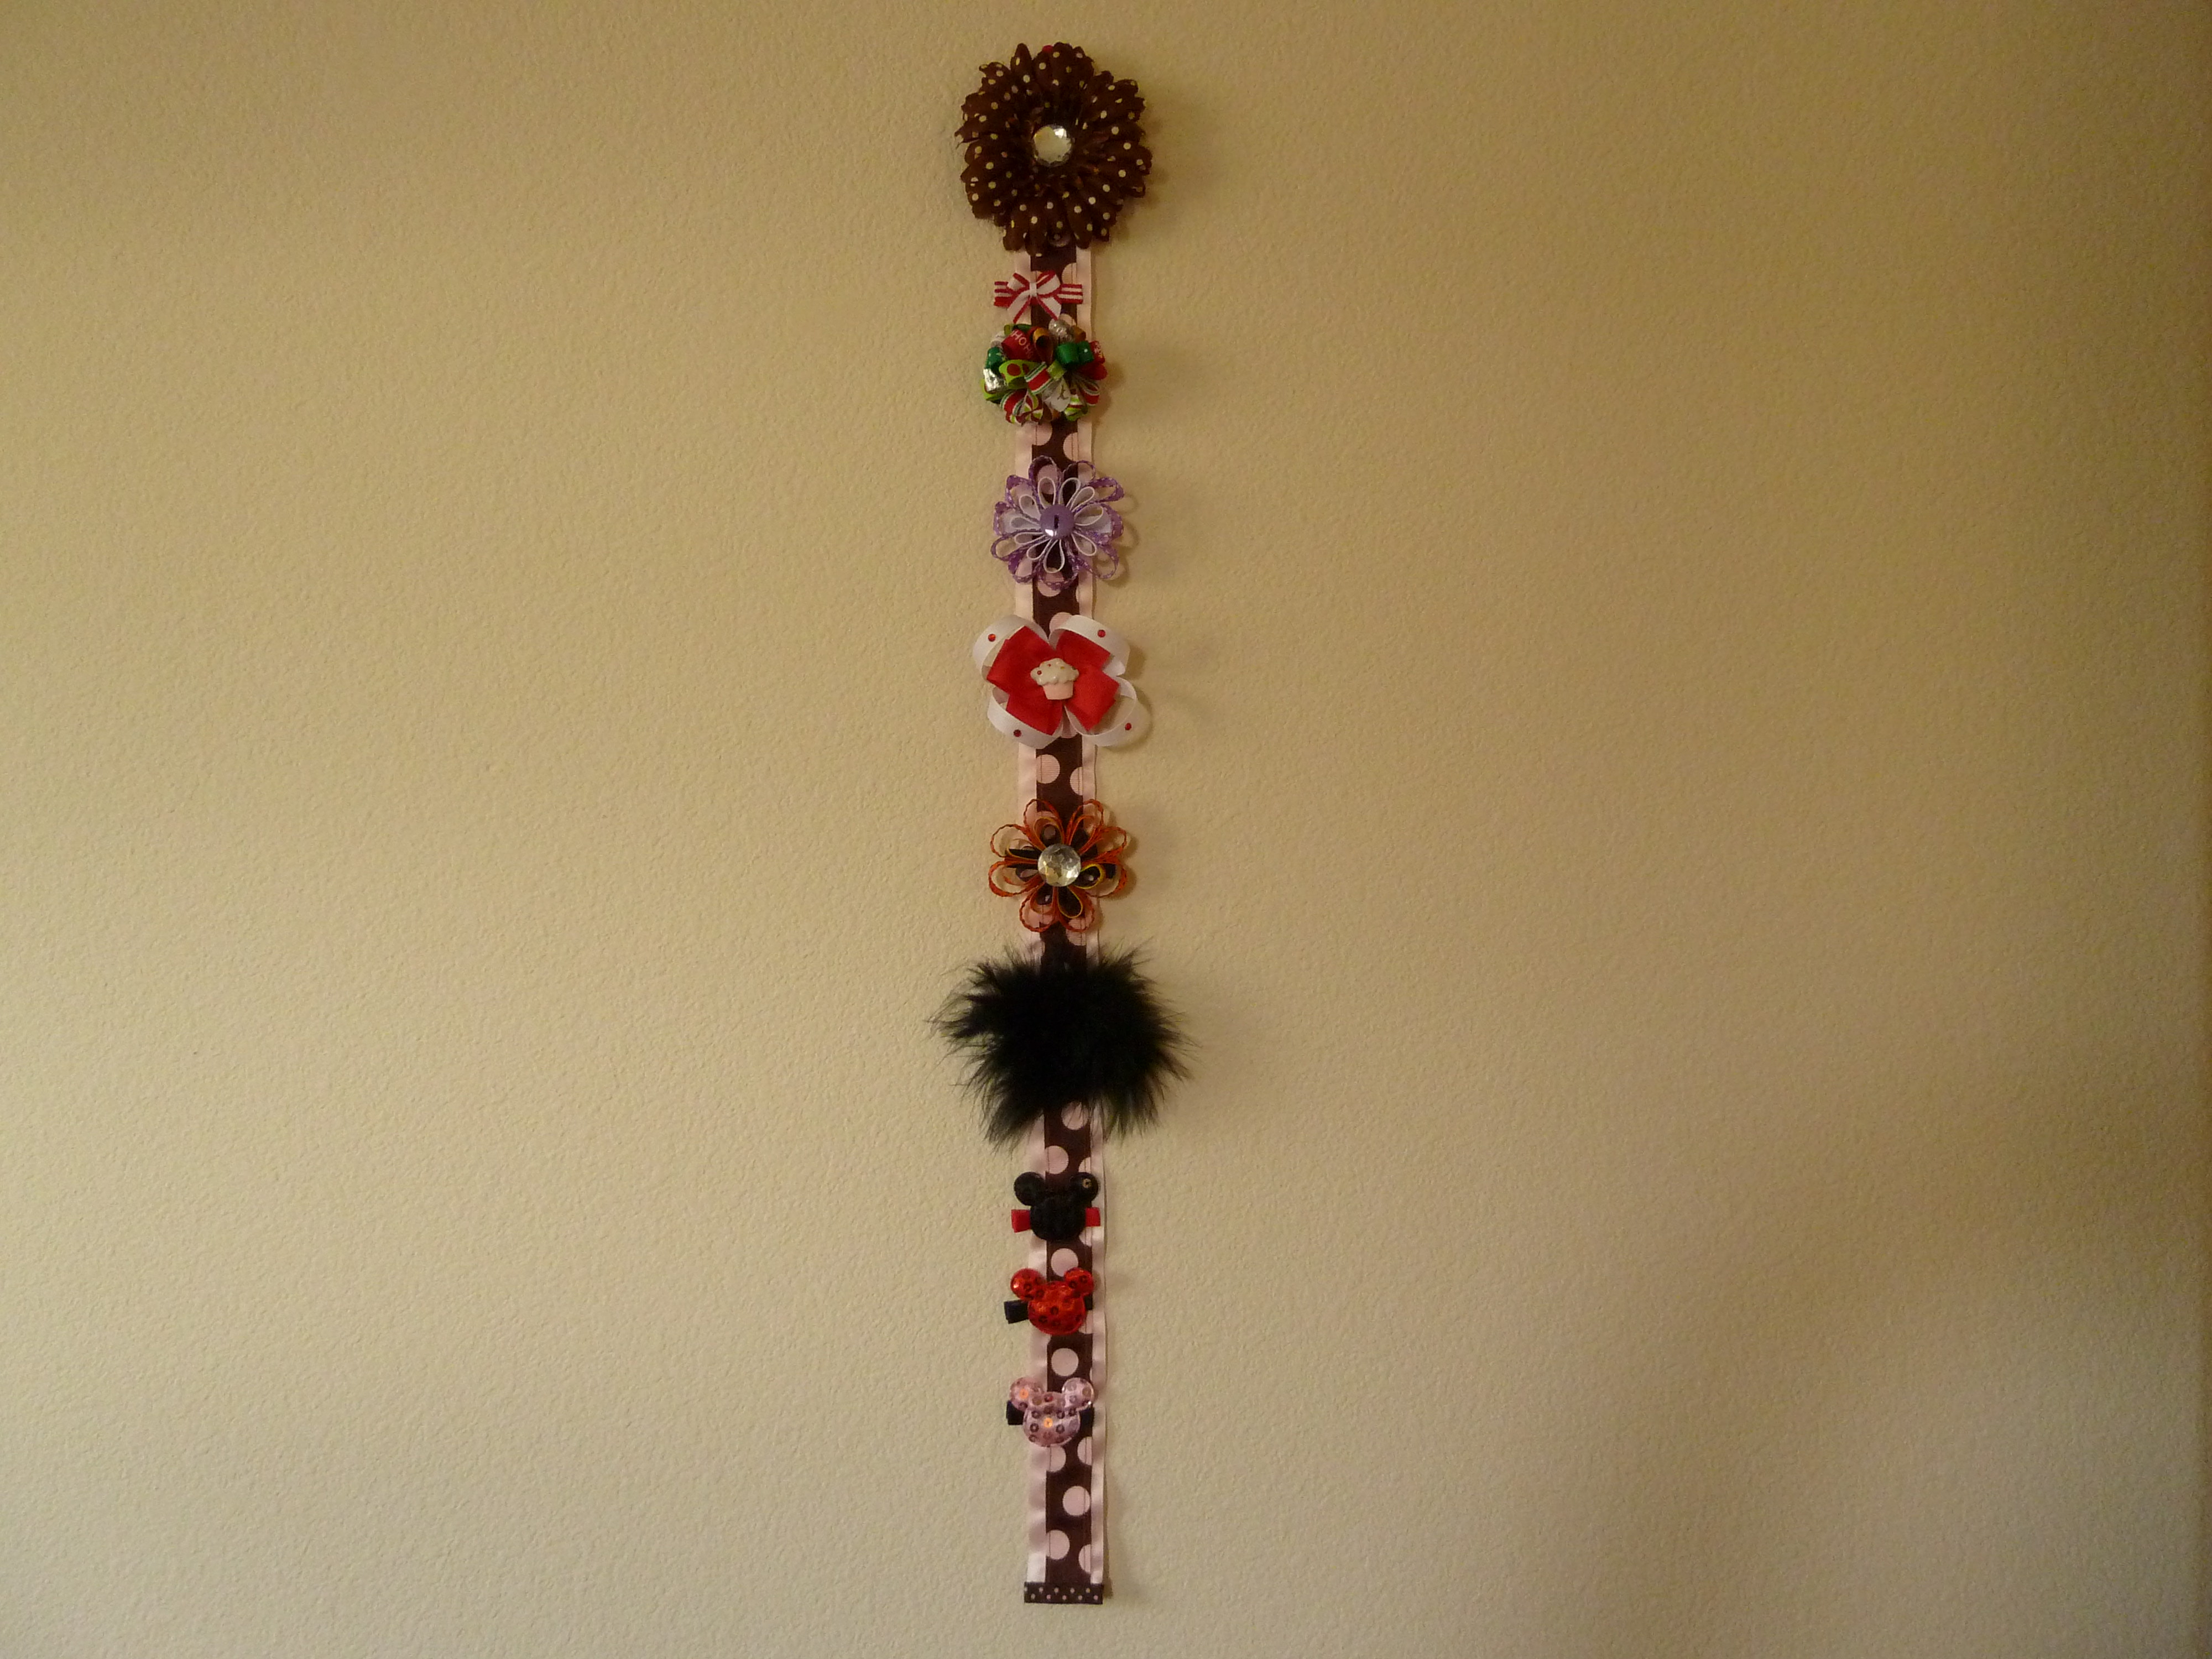
If you’re like me and are tired of finding hair clips wedged between couch cushions or under your daughter’s bed, there’s an easy solution.
Enter the bow holder; now hair clips will be off the floor and neatly hung up. No more dust bunnies all over your daughter’s bows and hair clips and here’s the bonus…this holder serves as a cute decoration for your girl’s wall or closet door. Functionality and beauty? Sign me up!
Sewing Scooby rating:
3 Margaritas 
Basic sewing skills are all you need for this project. It’s fast, easy, and uncomplicated. So if you can topstitch a straight line while having one of Nicole’s famous Whiskey Sours, go for it. And if you haven’t tried one of her Whiskey Sours yet then 1. shame on you, and 2. check out her recipe in Scooby Snacks.
THINGS YOU’LL NEED:
- Large daisy or other fabric flower, stemless (can be found at arts & crafts stores or online–I get mine from a fellow etsy seller and it comes with a large 22mm rhinestone center…I love me some bling for projects like this)
- 32″ length of 1.5″-2″ wide ribbon (this is your main ribbon)
- 32″ length of .5″-1″ wide accent ribbon (will be centered on your main ribbon)
- 3.5″-4.5″ piece of your accent ribbon
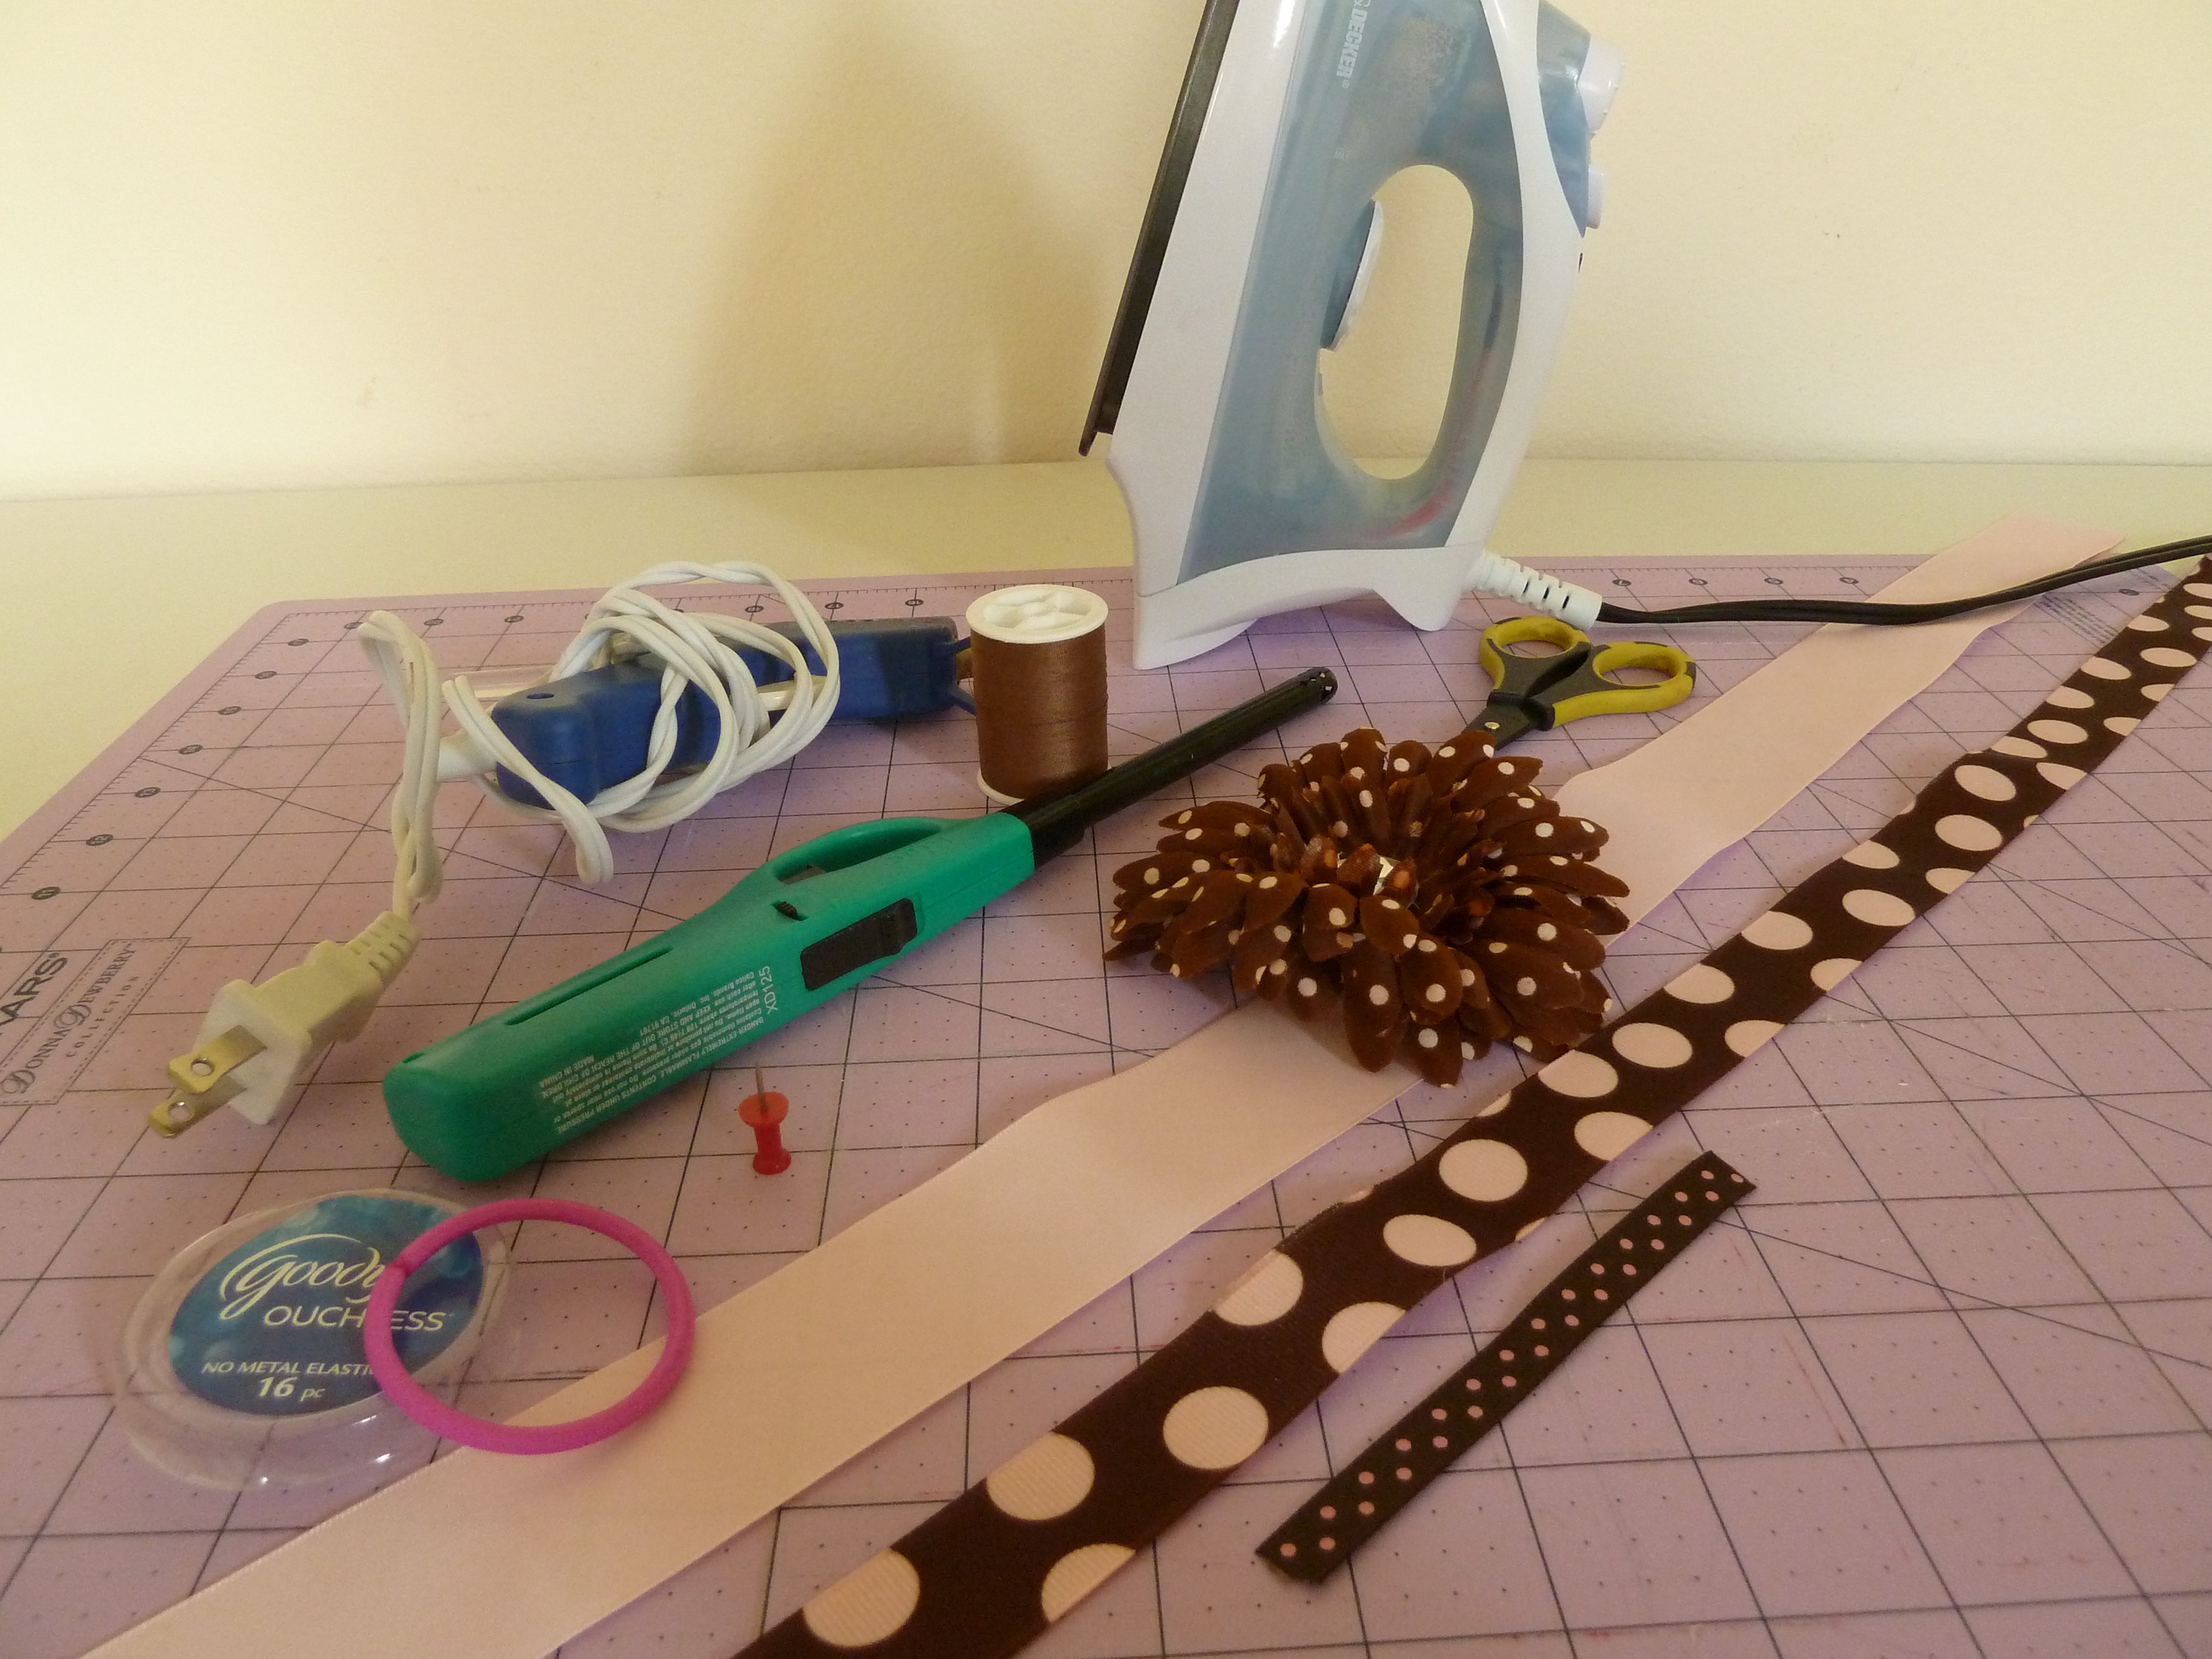
- Sewing machine and coordinating thread
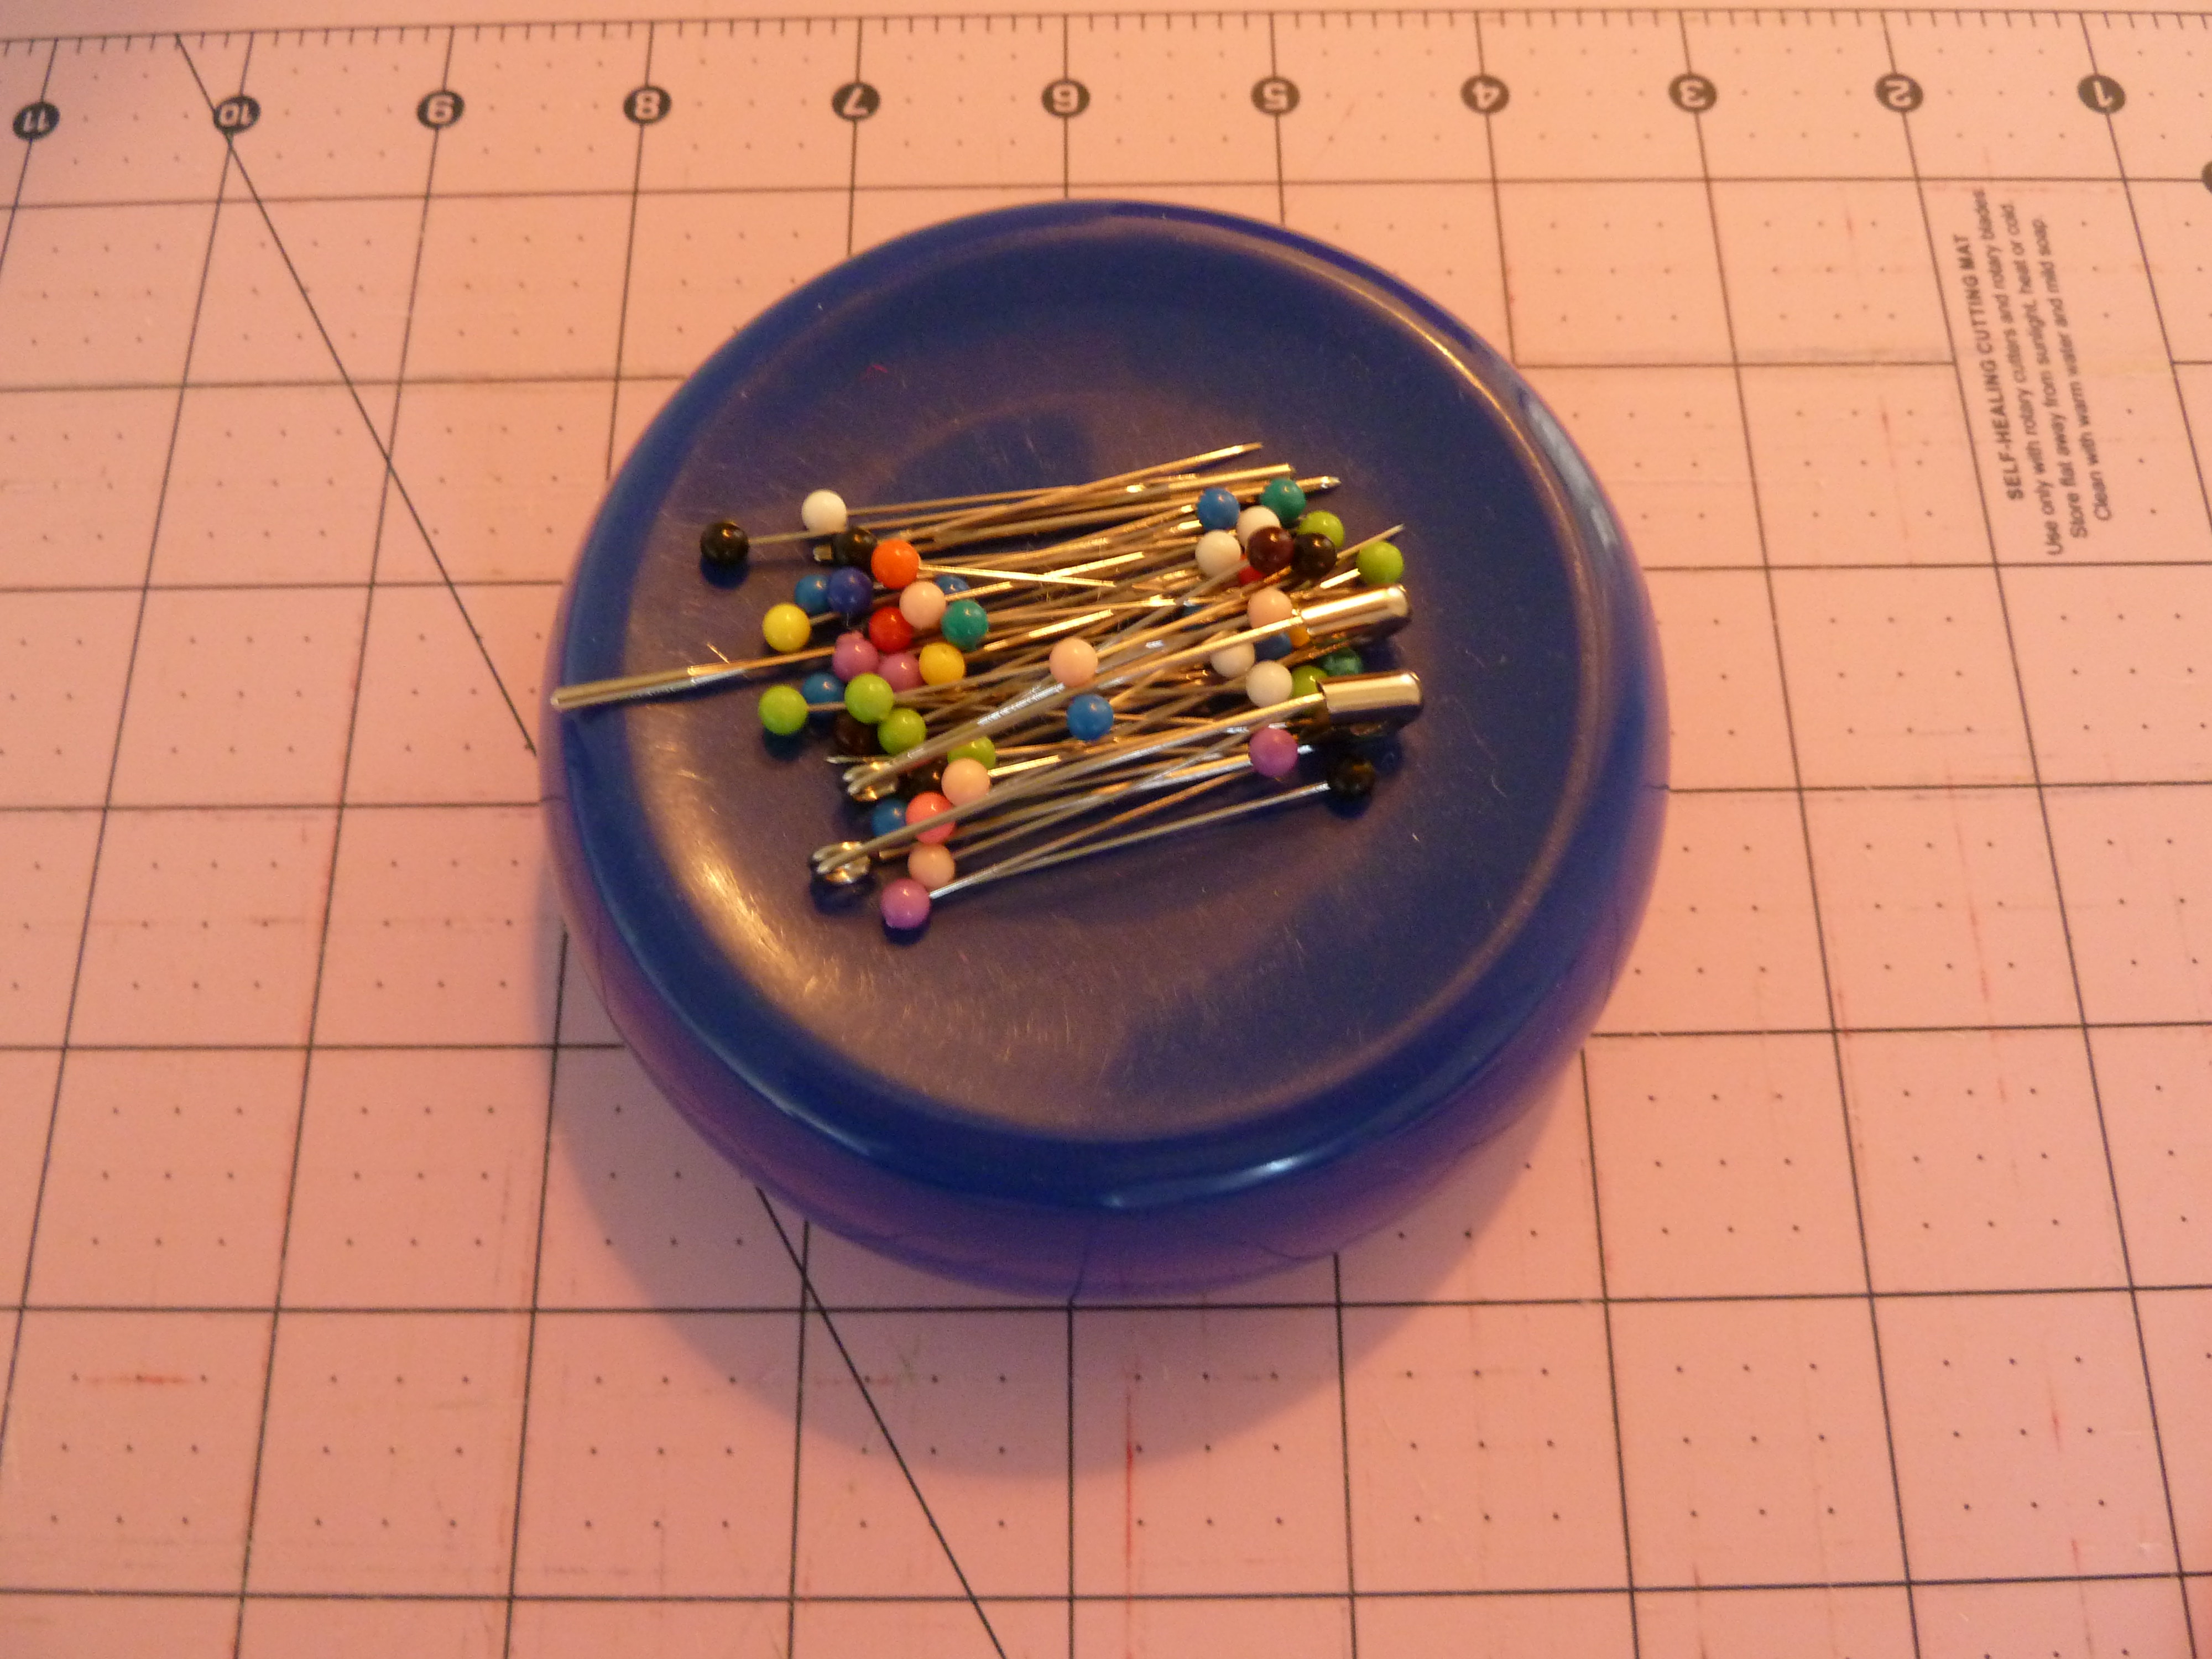
- Pins
- 1 pony ‘o (hair elastic)
- Hot glue gun with glue stick
- Scissors
- Ruler or cutting board
- Long lighter
- Iron and ironing board
- Spray starch (optional)
- Hammer and nail or thumb tack for hanging bow
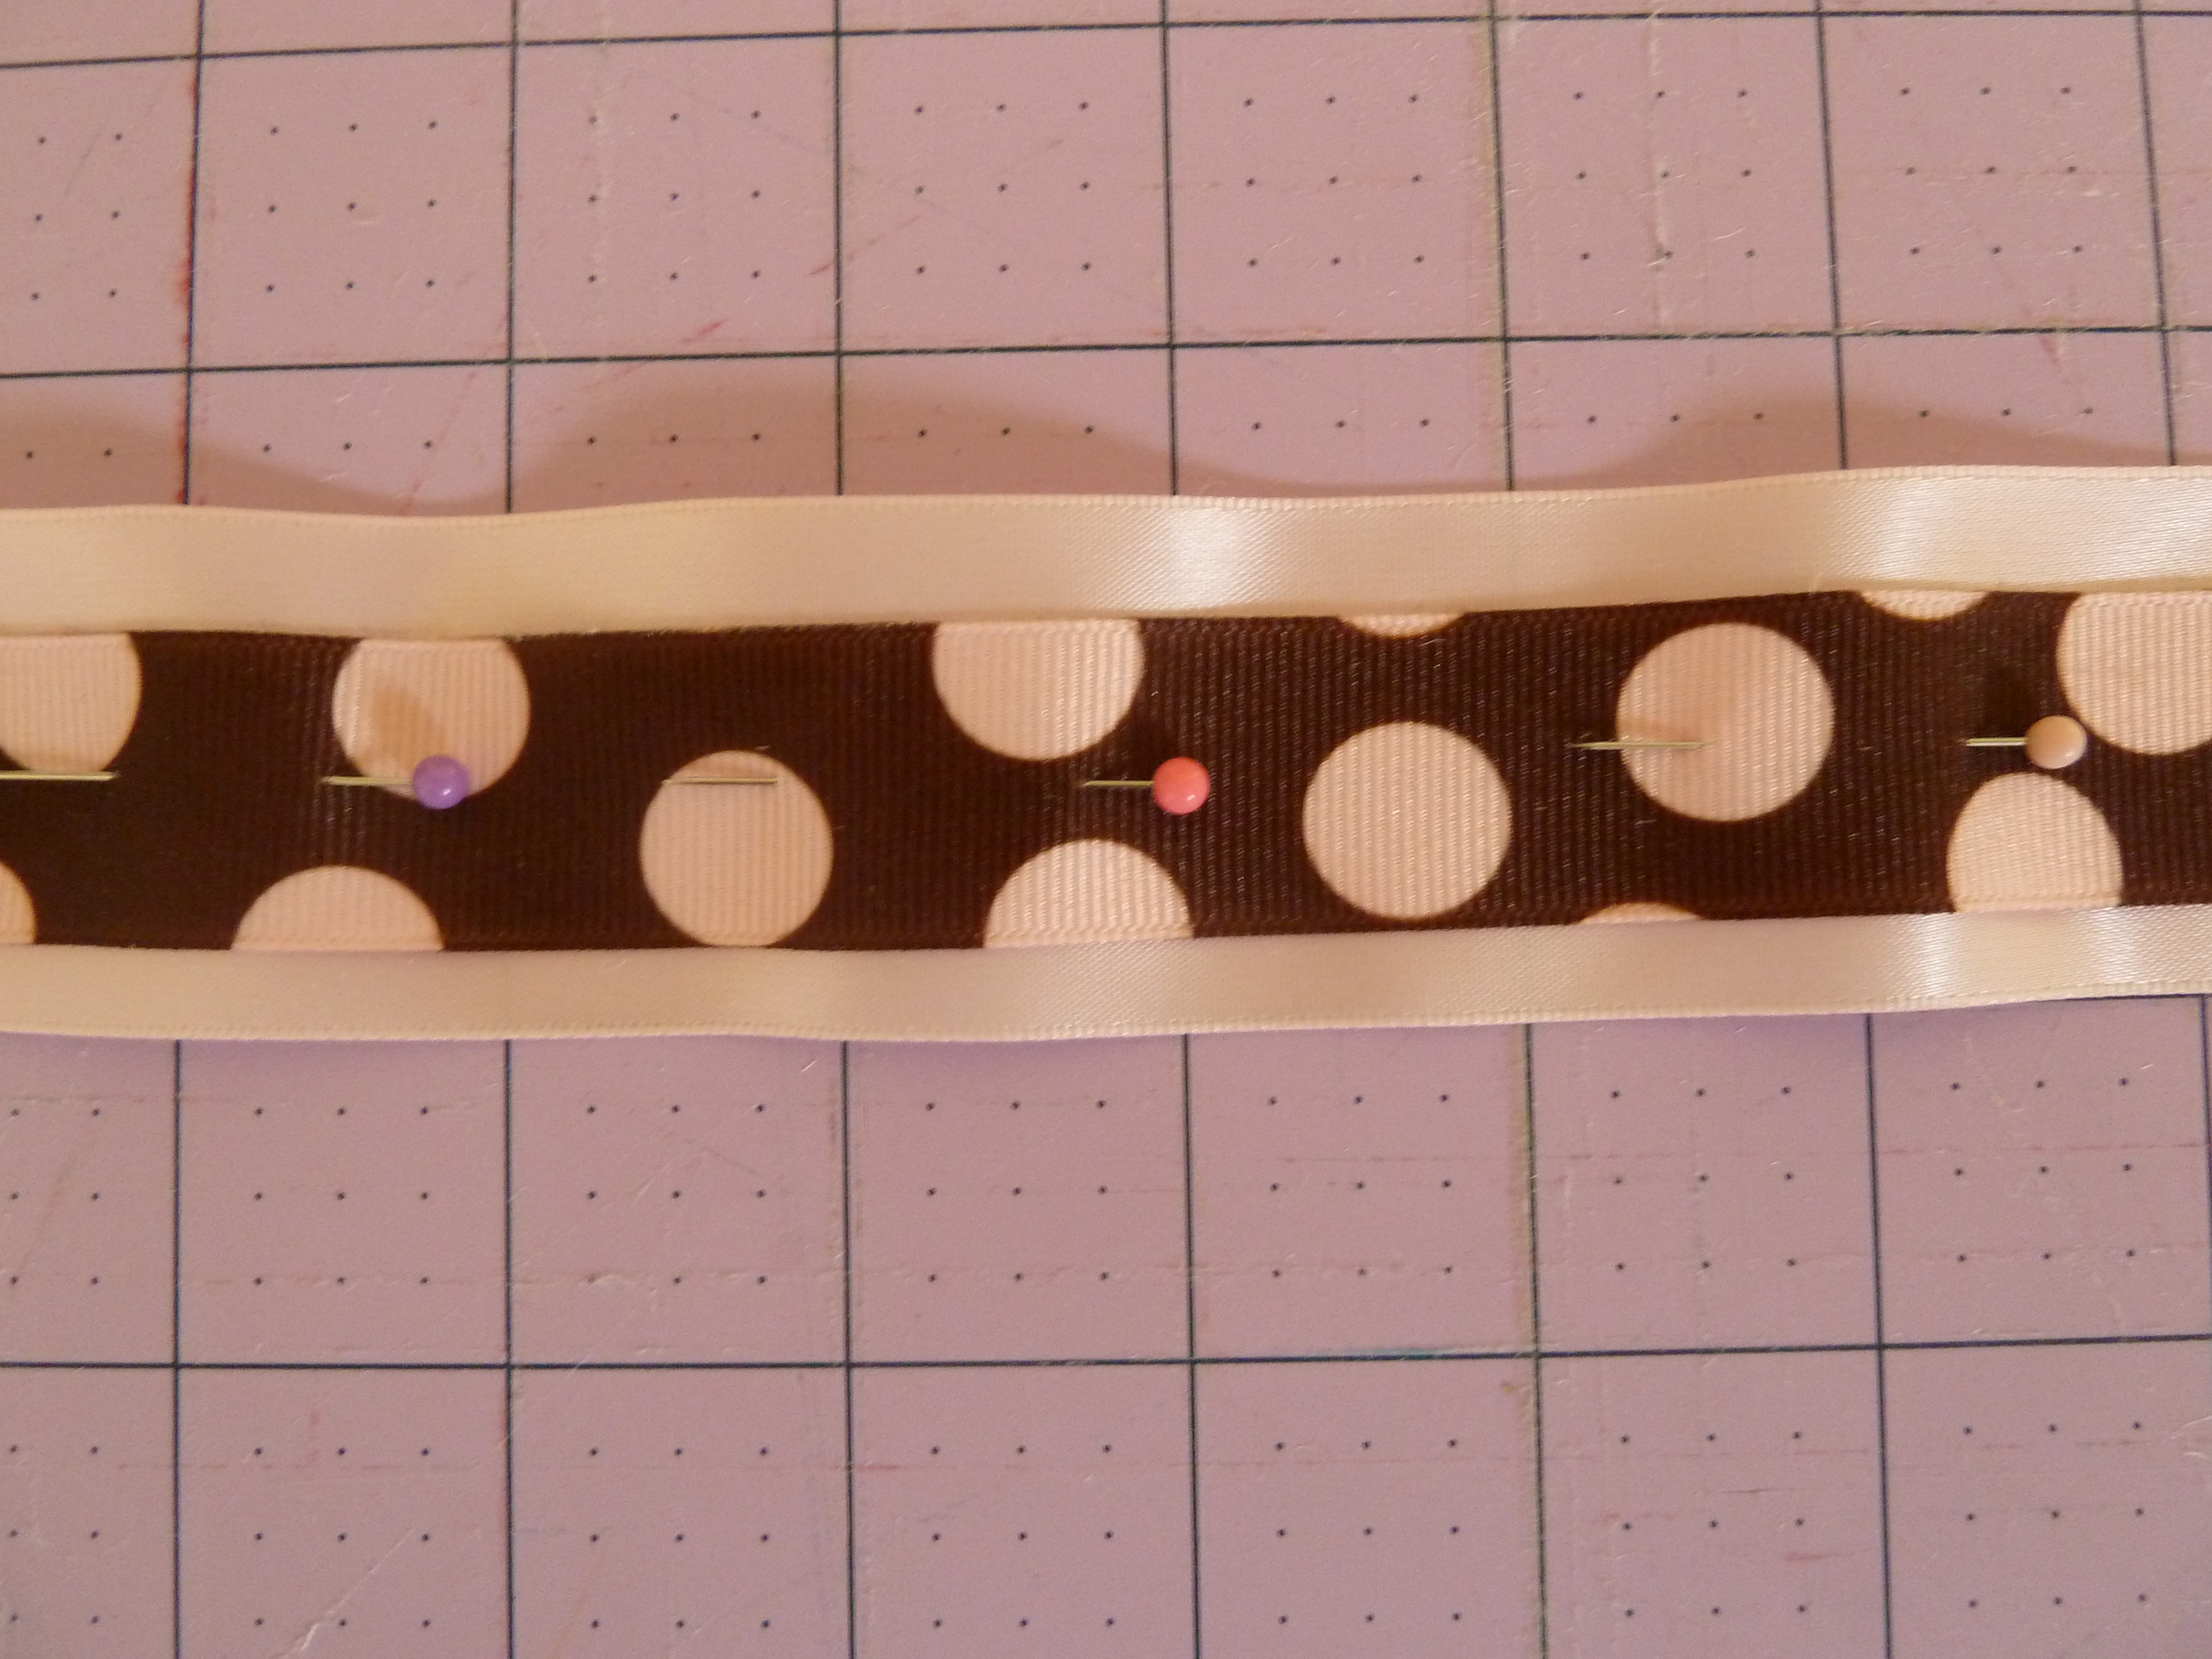
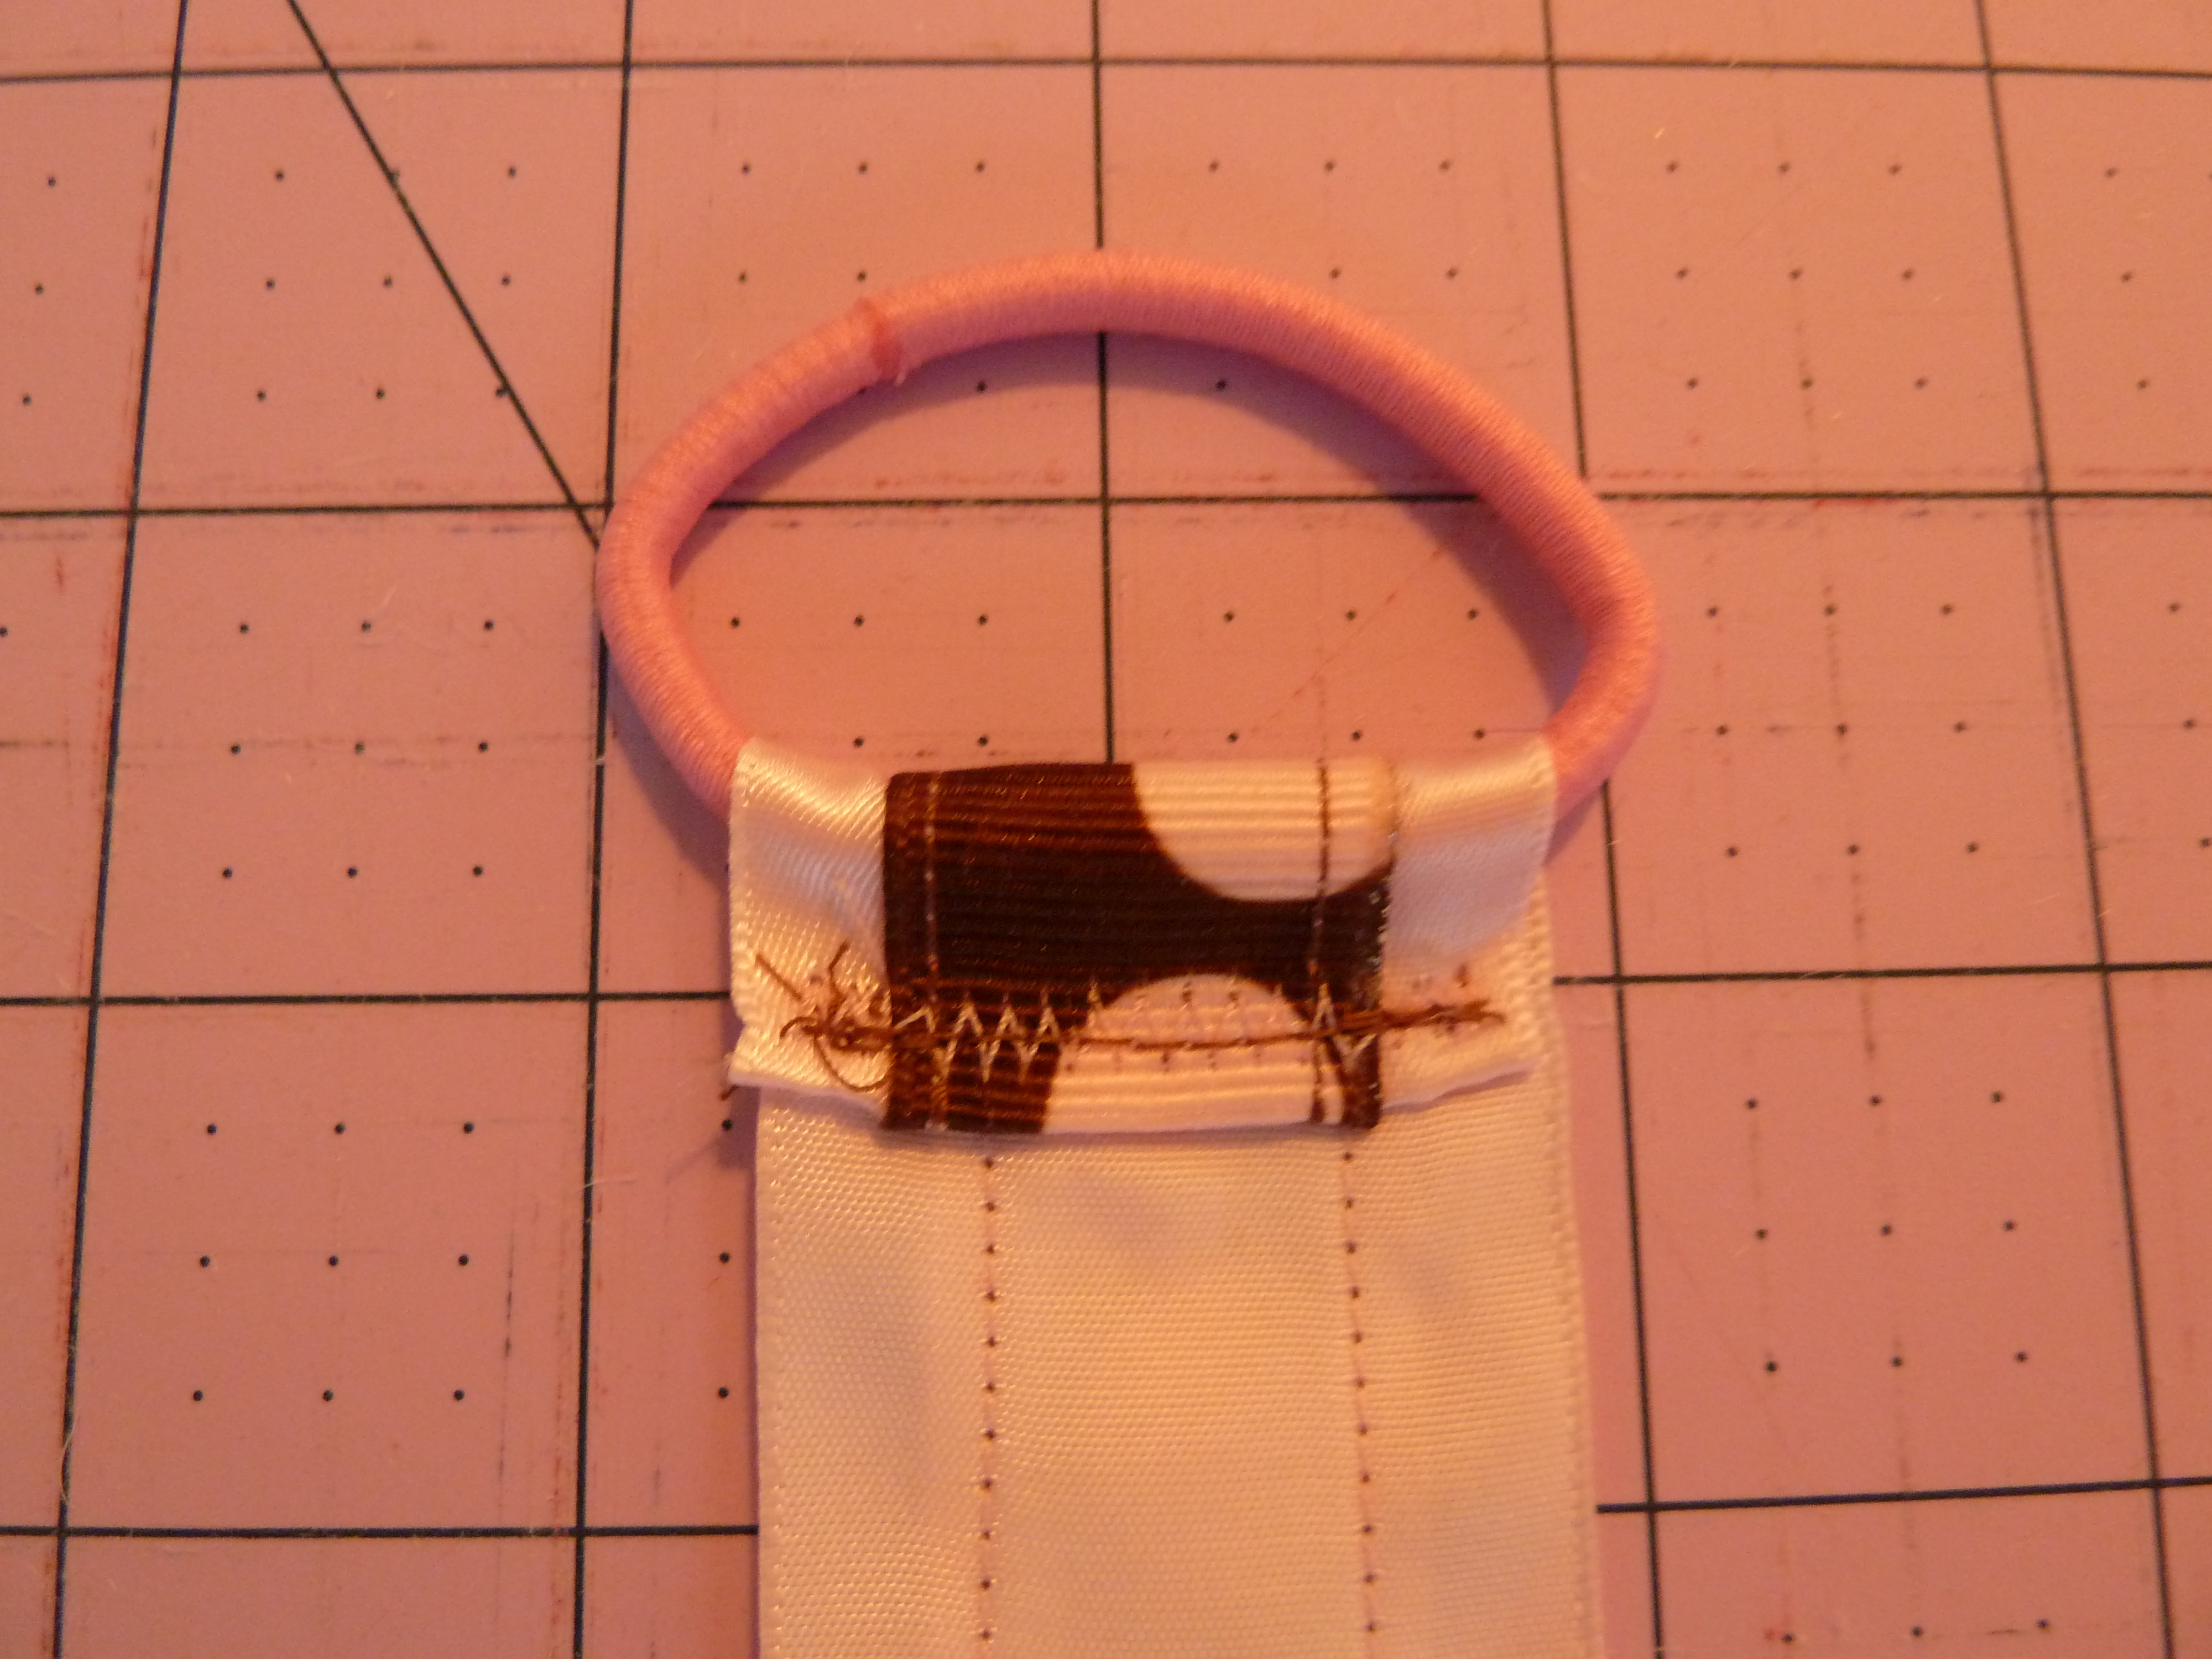
1. Center accent ribbon onto main ribbon and pin in place.

With or without scooby snacks, I don’t trust my ability to ‘eye ball’ measurements; I chose to use a “dissolve in water” pen to mark the center of the main ribbon.
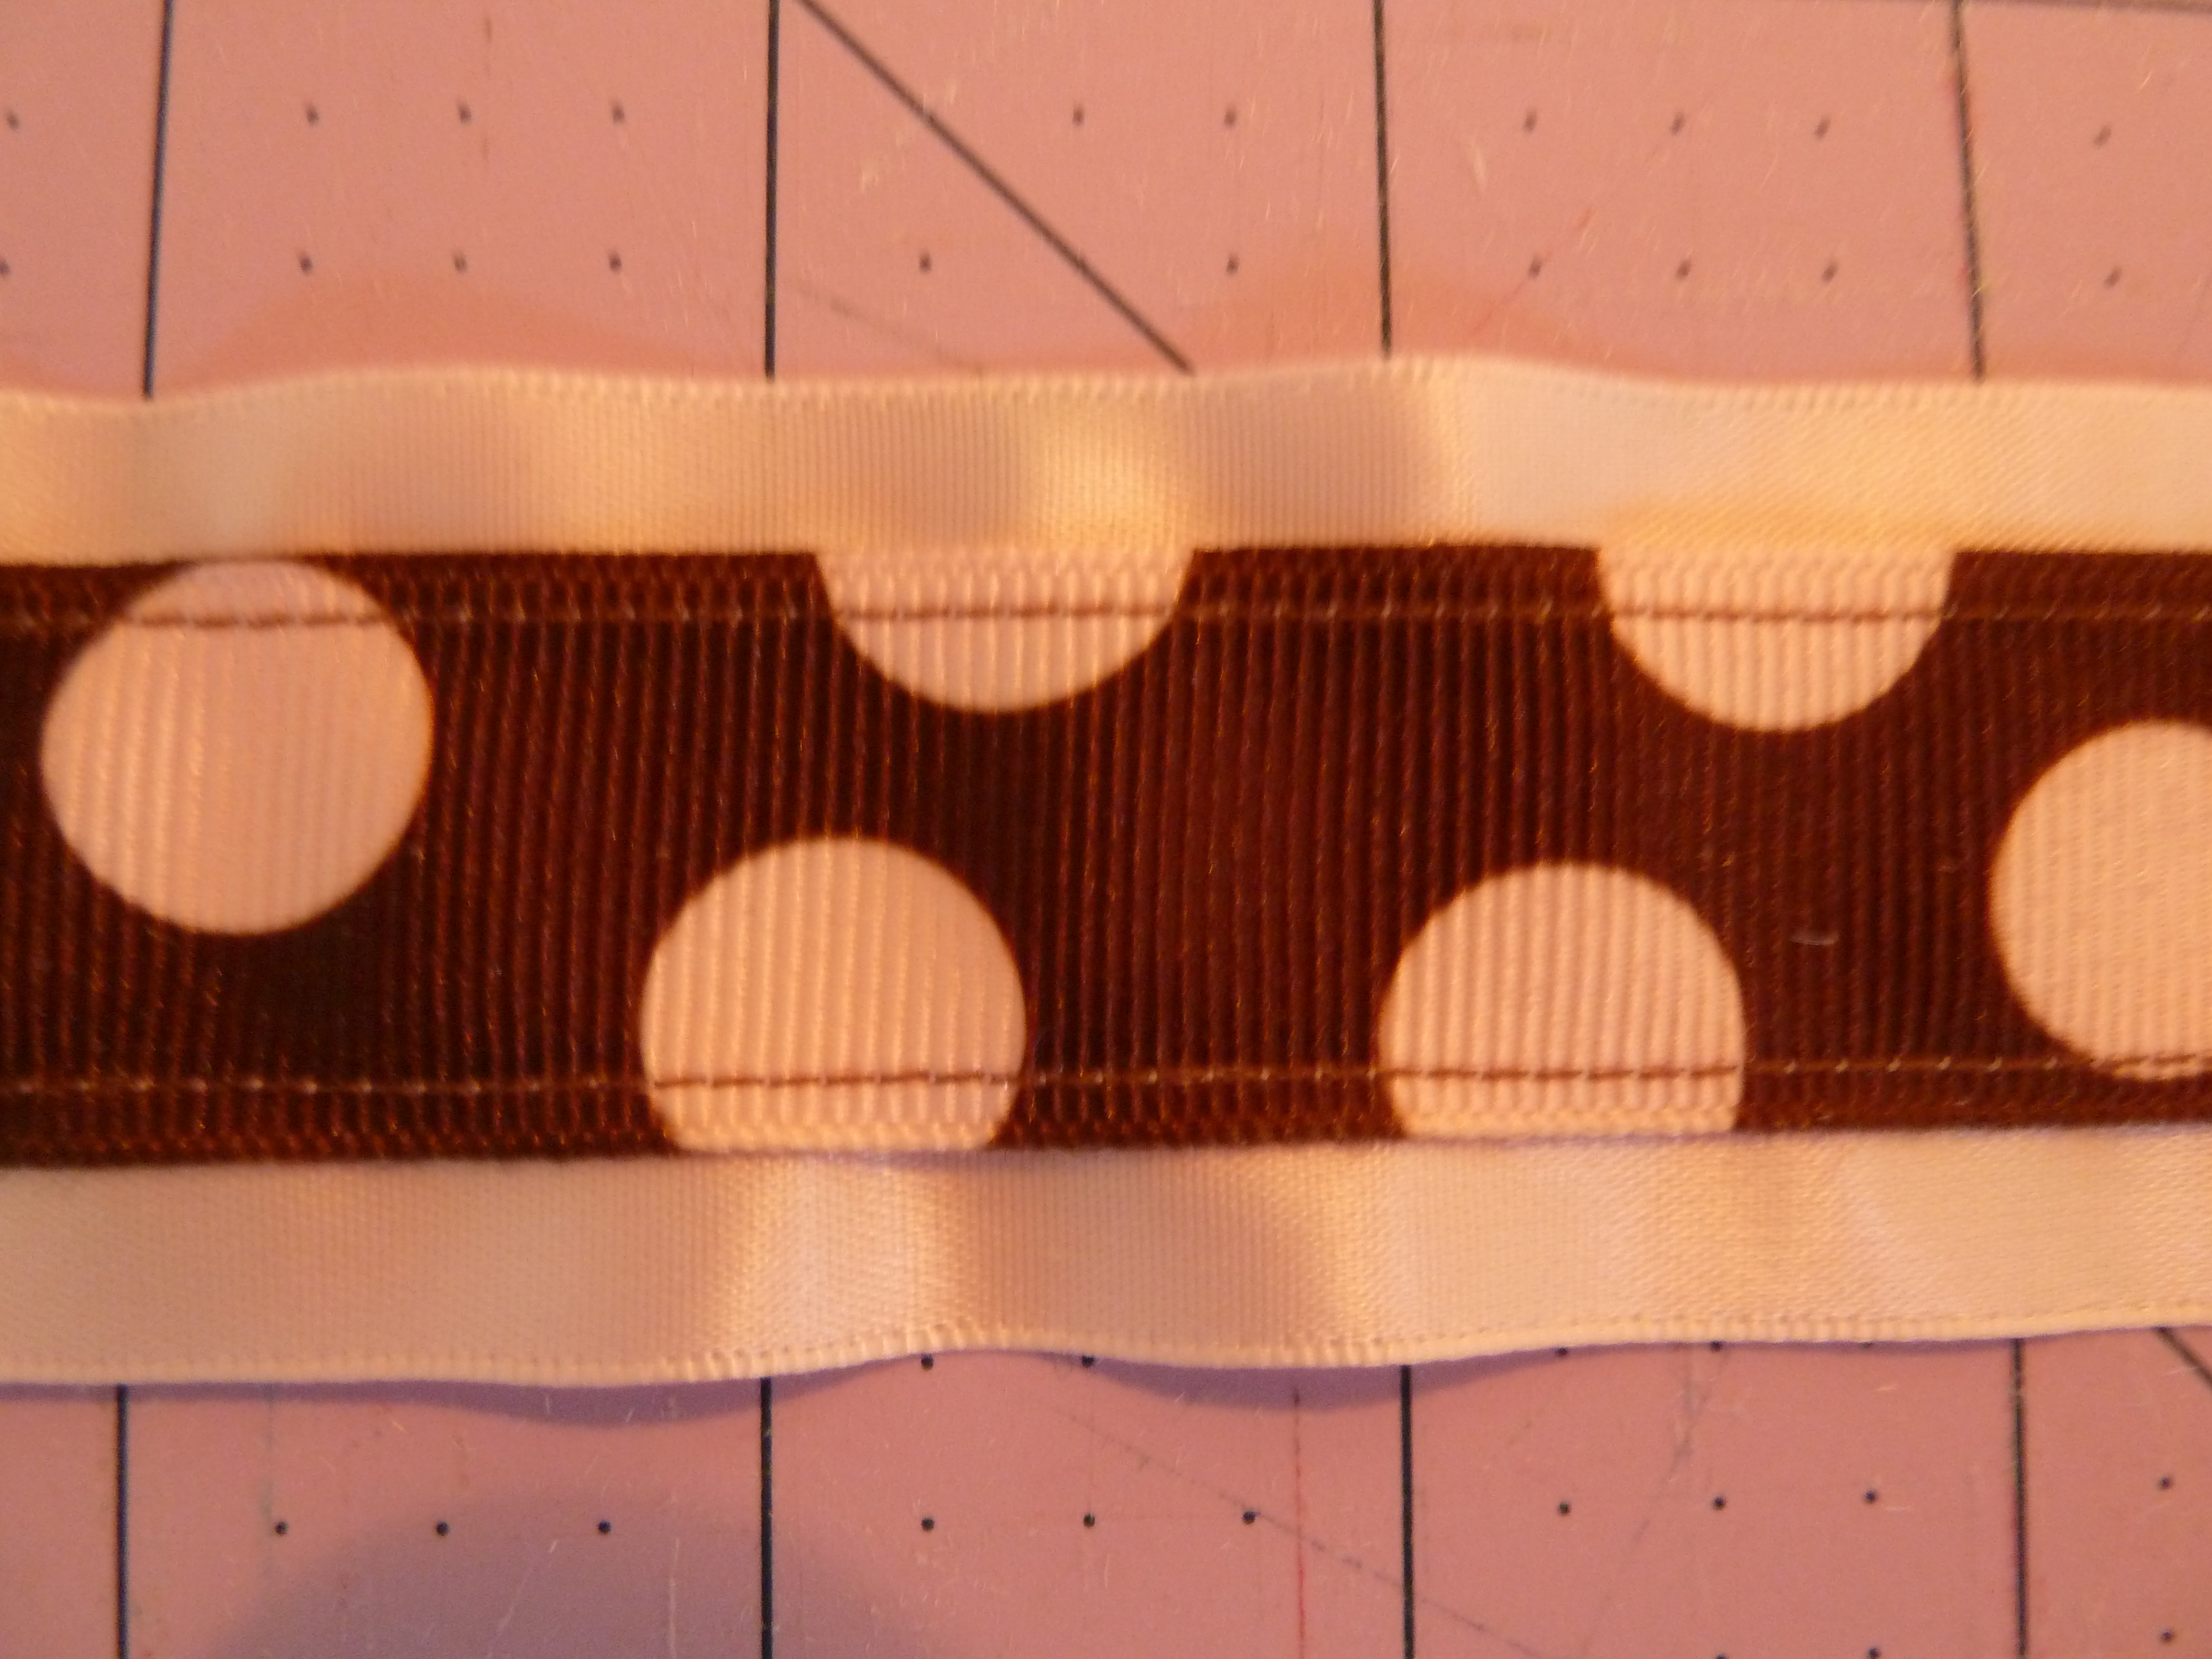
2. Bring the pinned ribbons to the sewing machine. You don’t even need to get comfortable here, as you’ll be sewing for about 3 seconds. Topstitch 2 lines onto the ribbon using a scant seam allowance. I simply try to hug the edge of the accent trim.
3. At both ends of the ribbon, fold edges over about 1/4 ” and press with iron. You now have no raw edges exposed on the front of your ribbon.
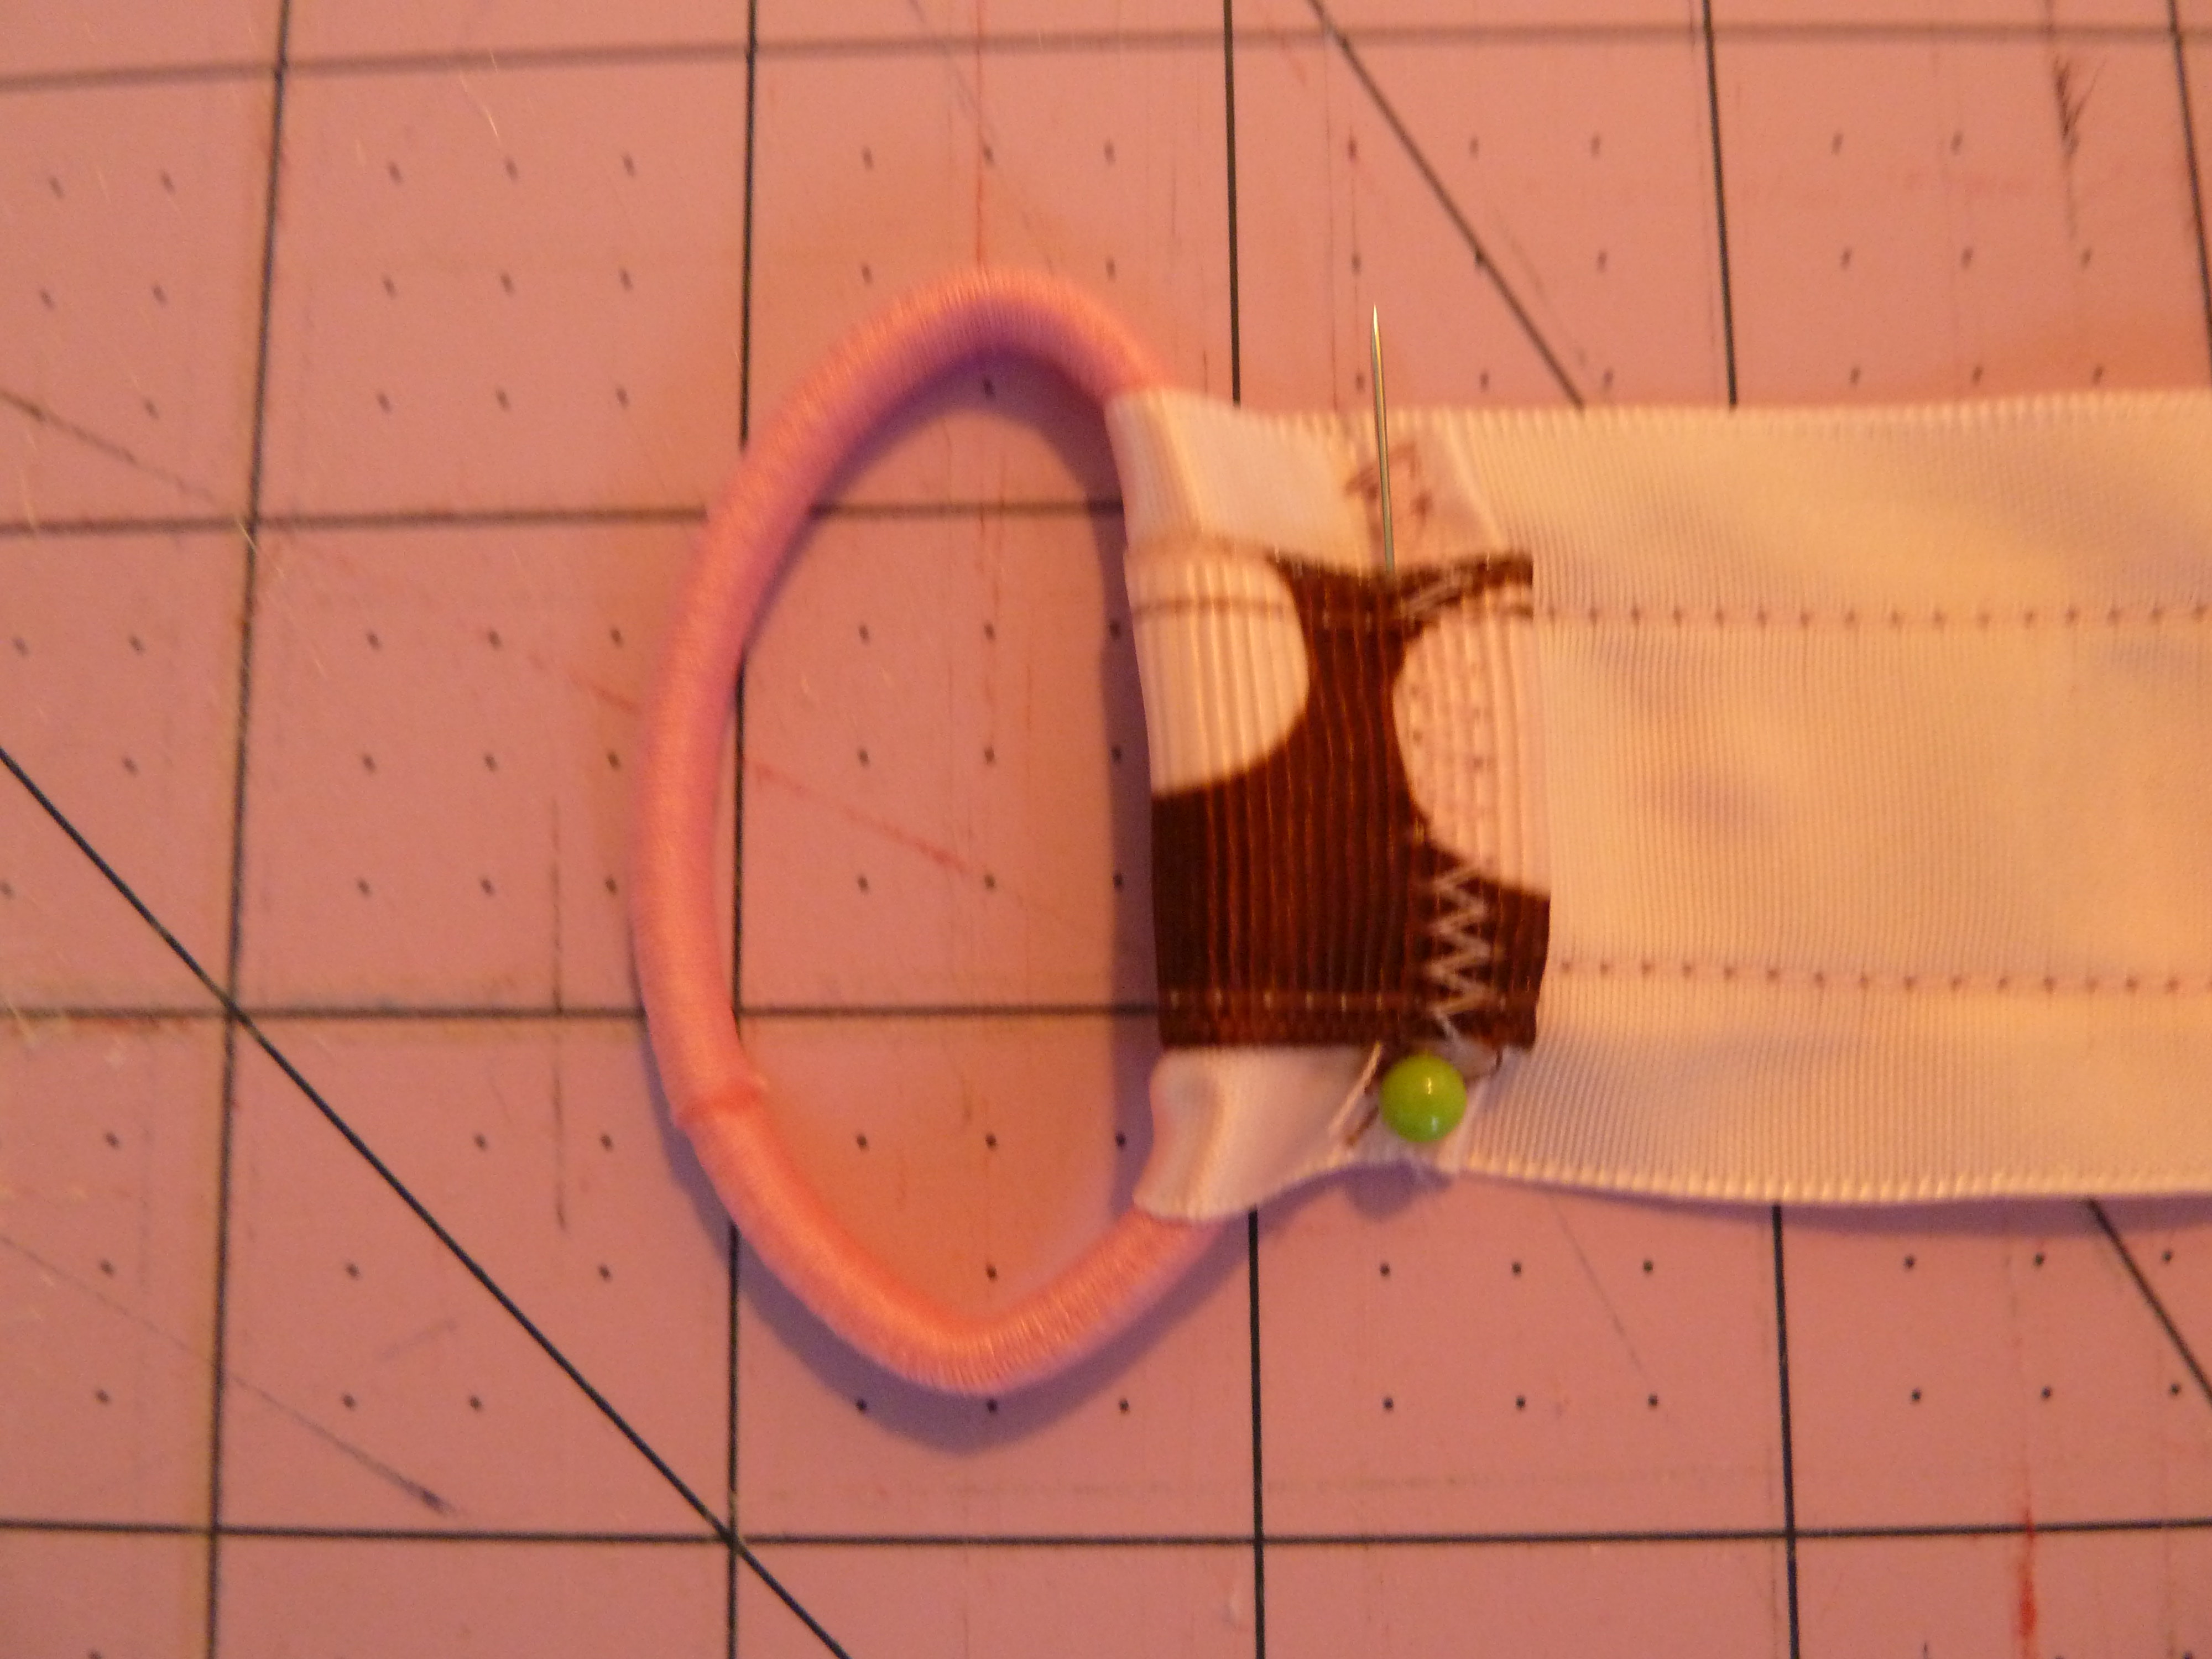
4. Back at the sewing machine once again…sew these two ribbon ends with a straight or zig zag stitch.
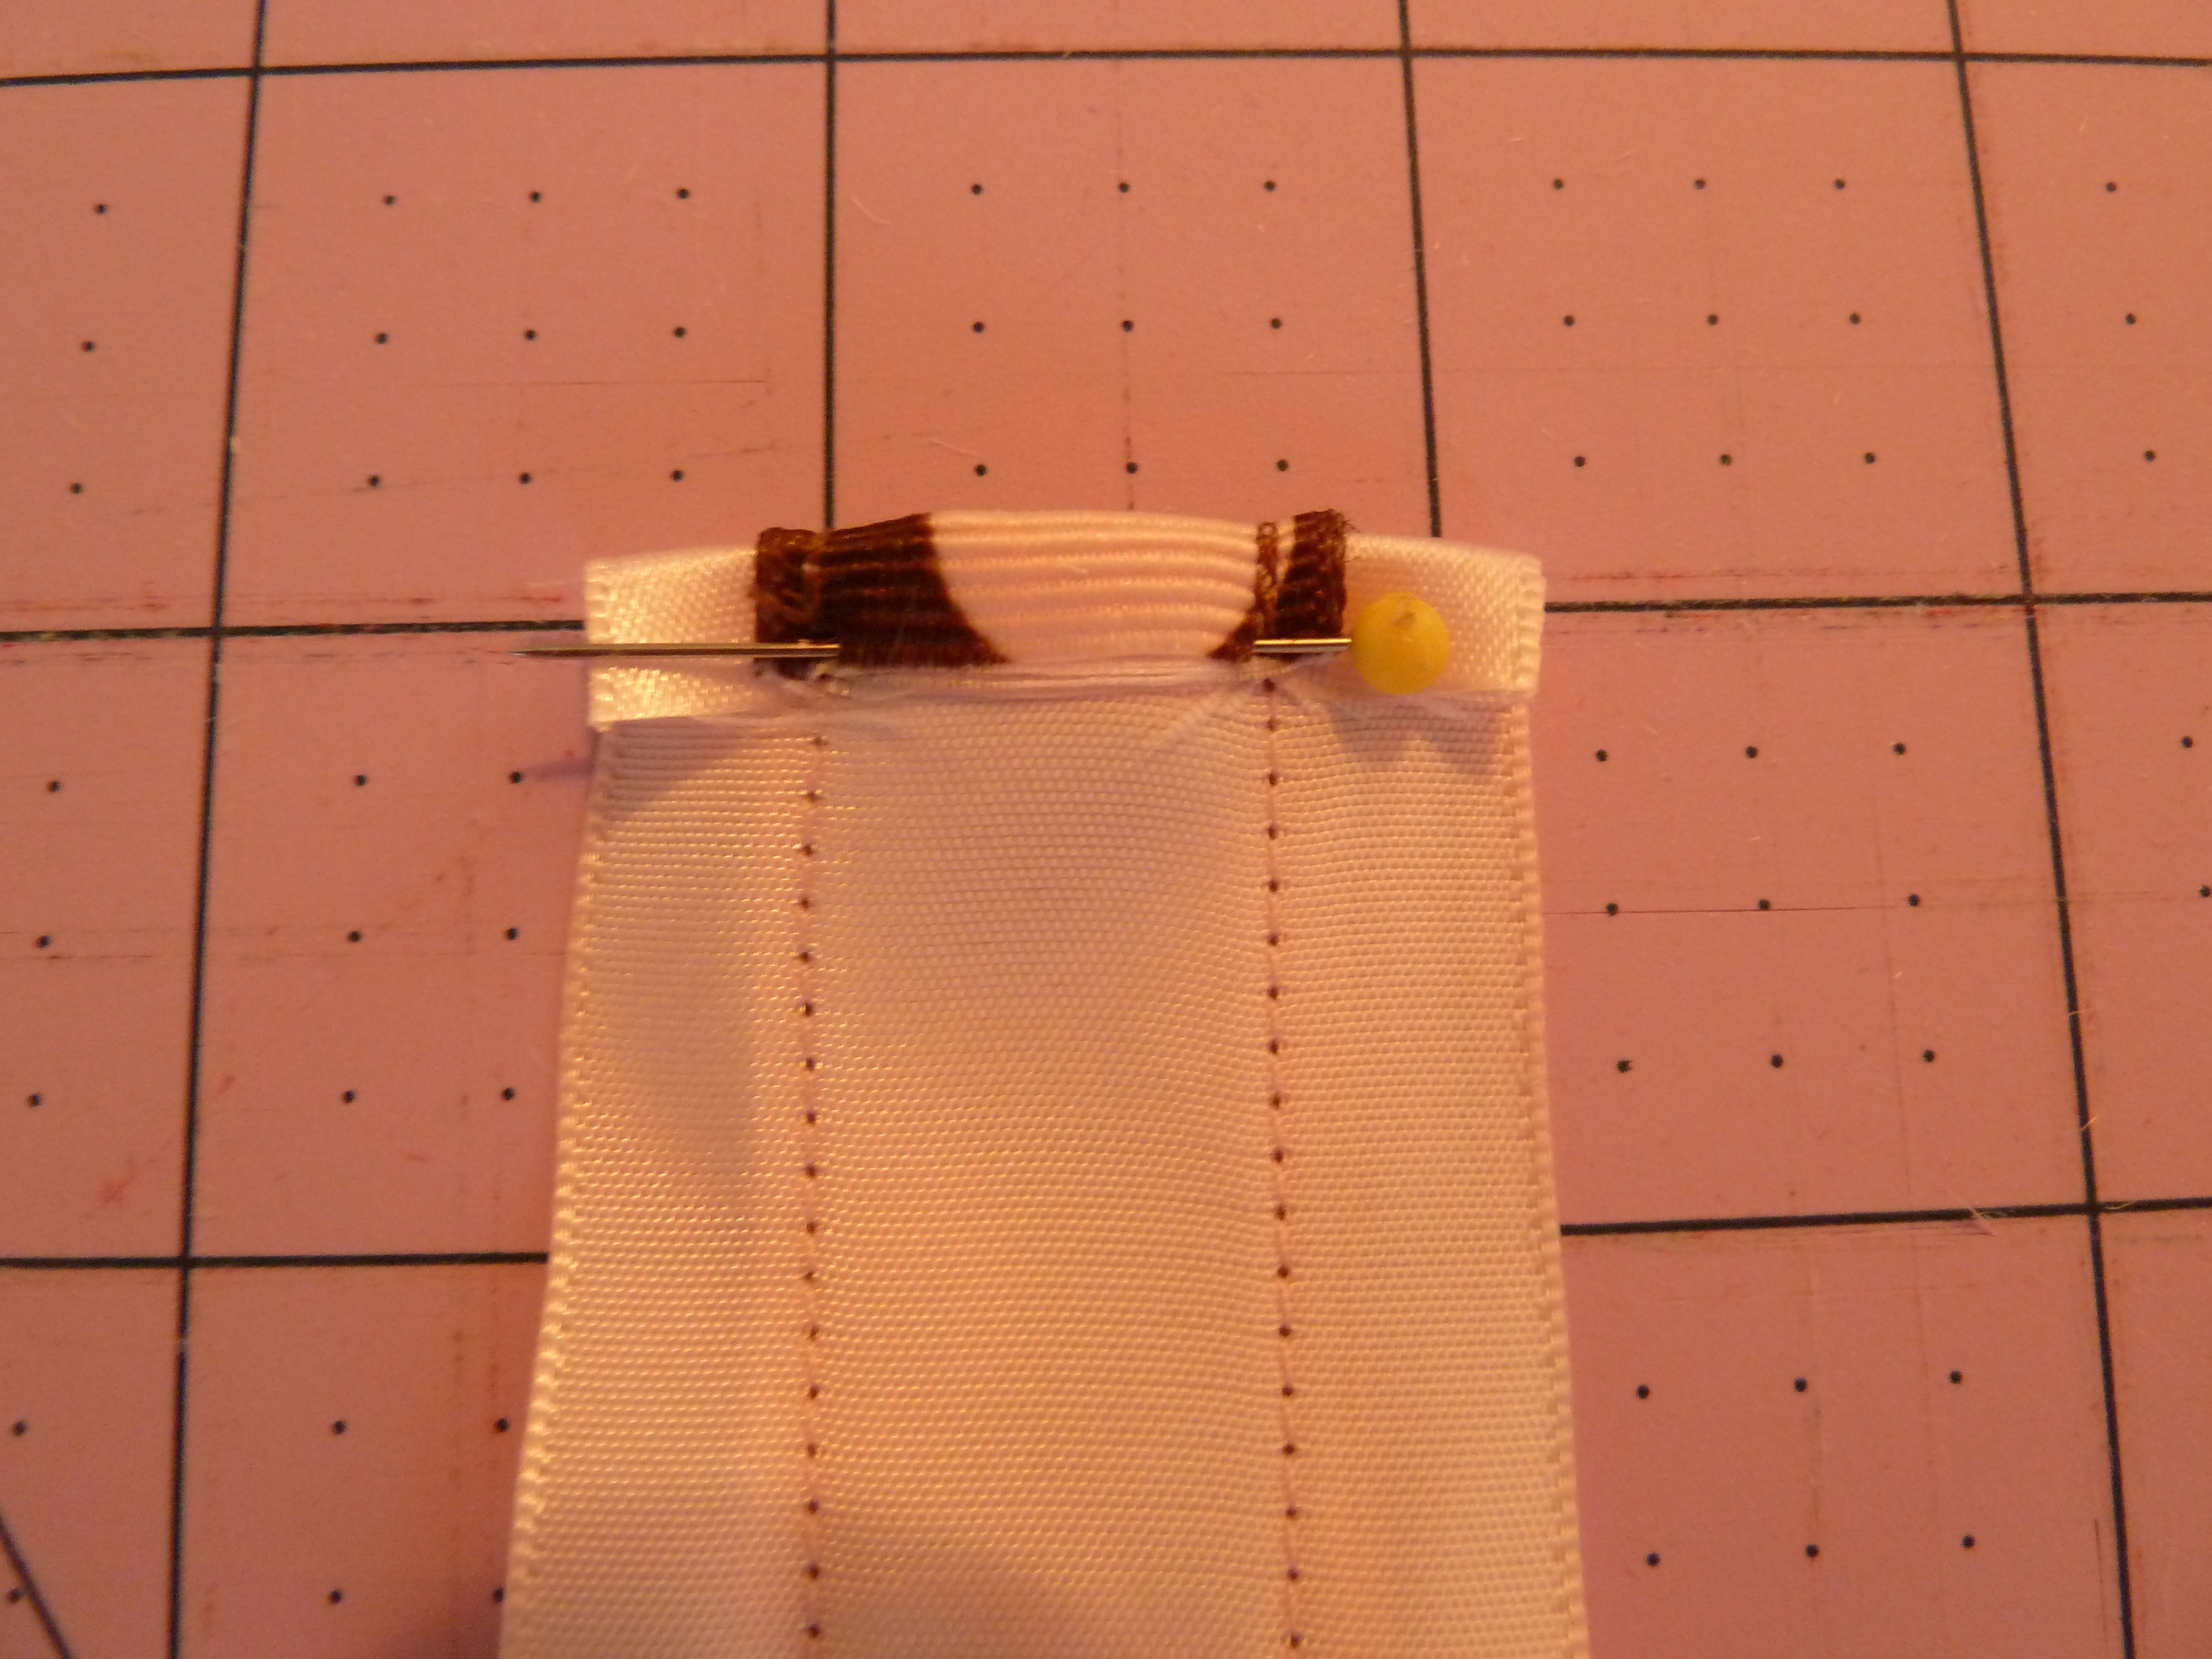
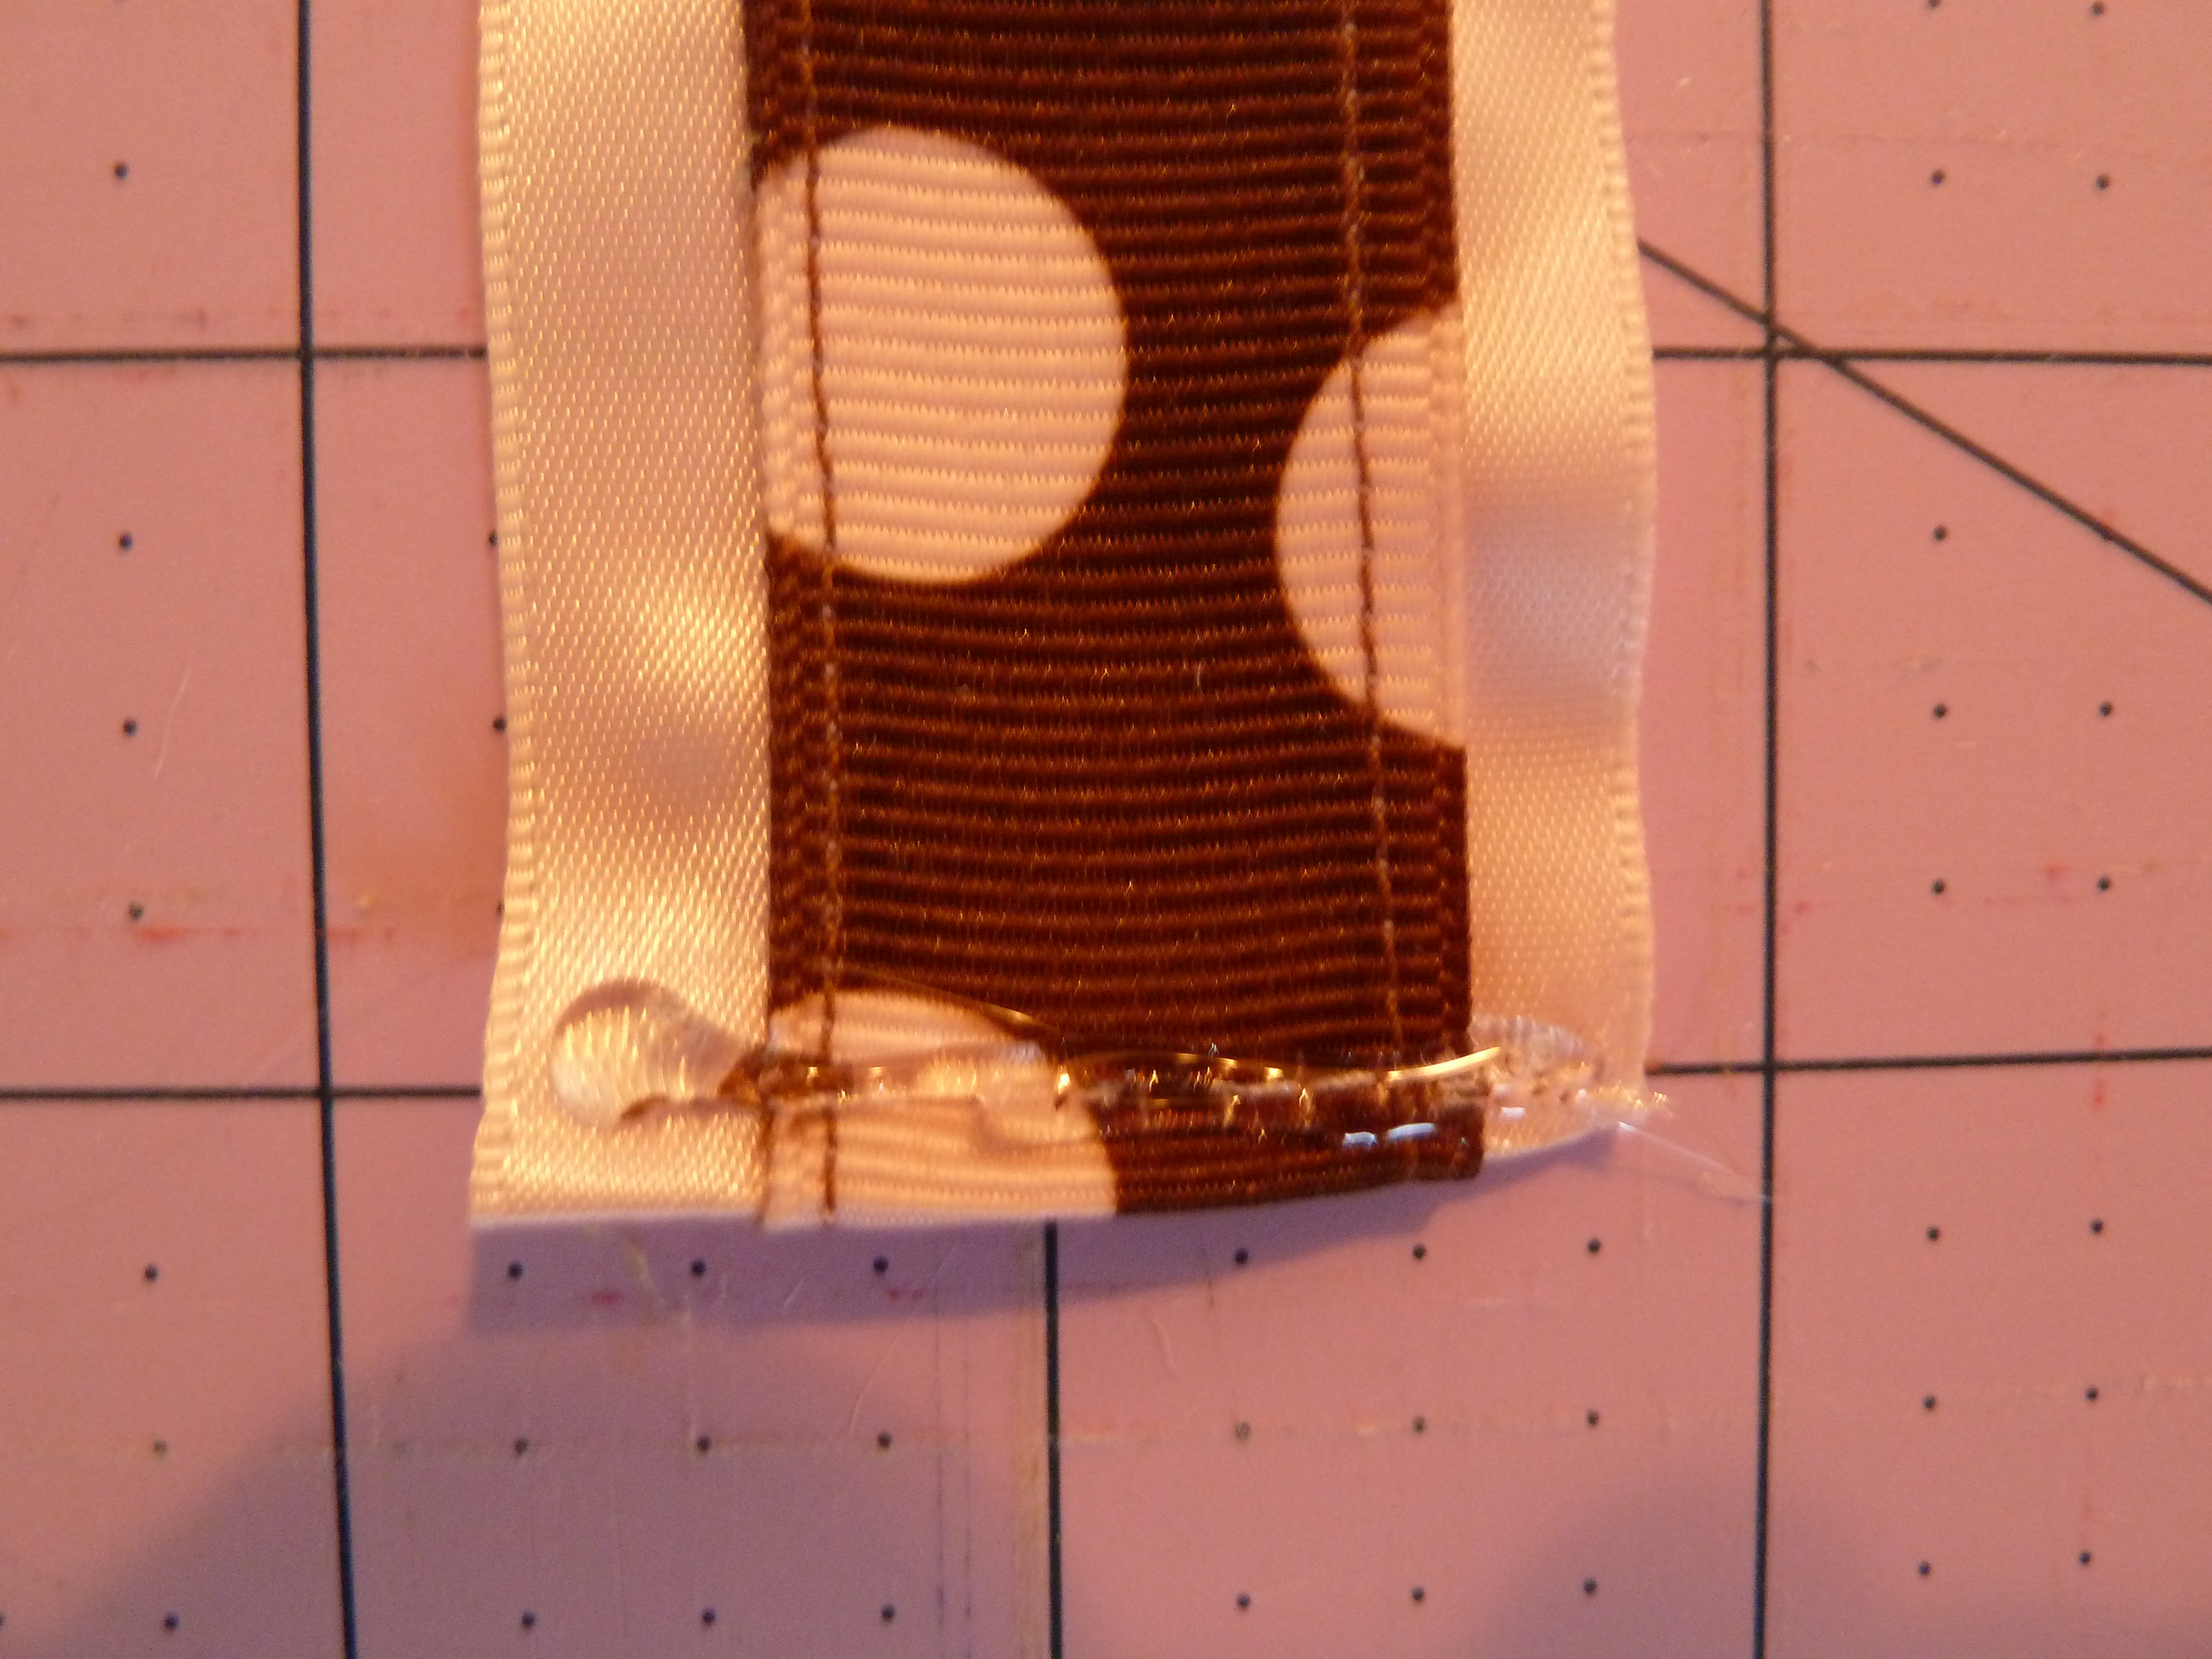
5. With ribbon WRONG side up, place ribbon through the pony ‘o. Fold ribbon over to encase pony ‘o and sew in place.

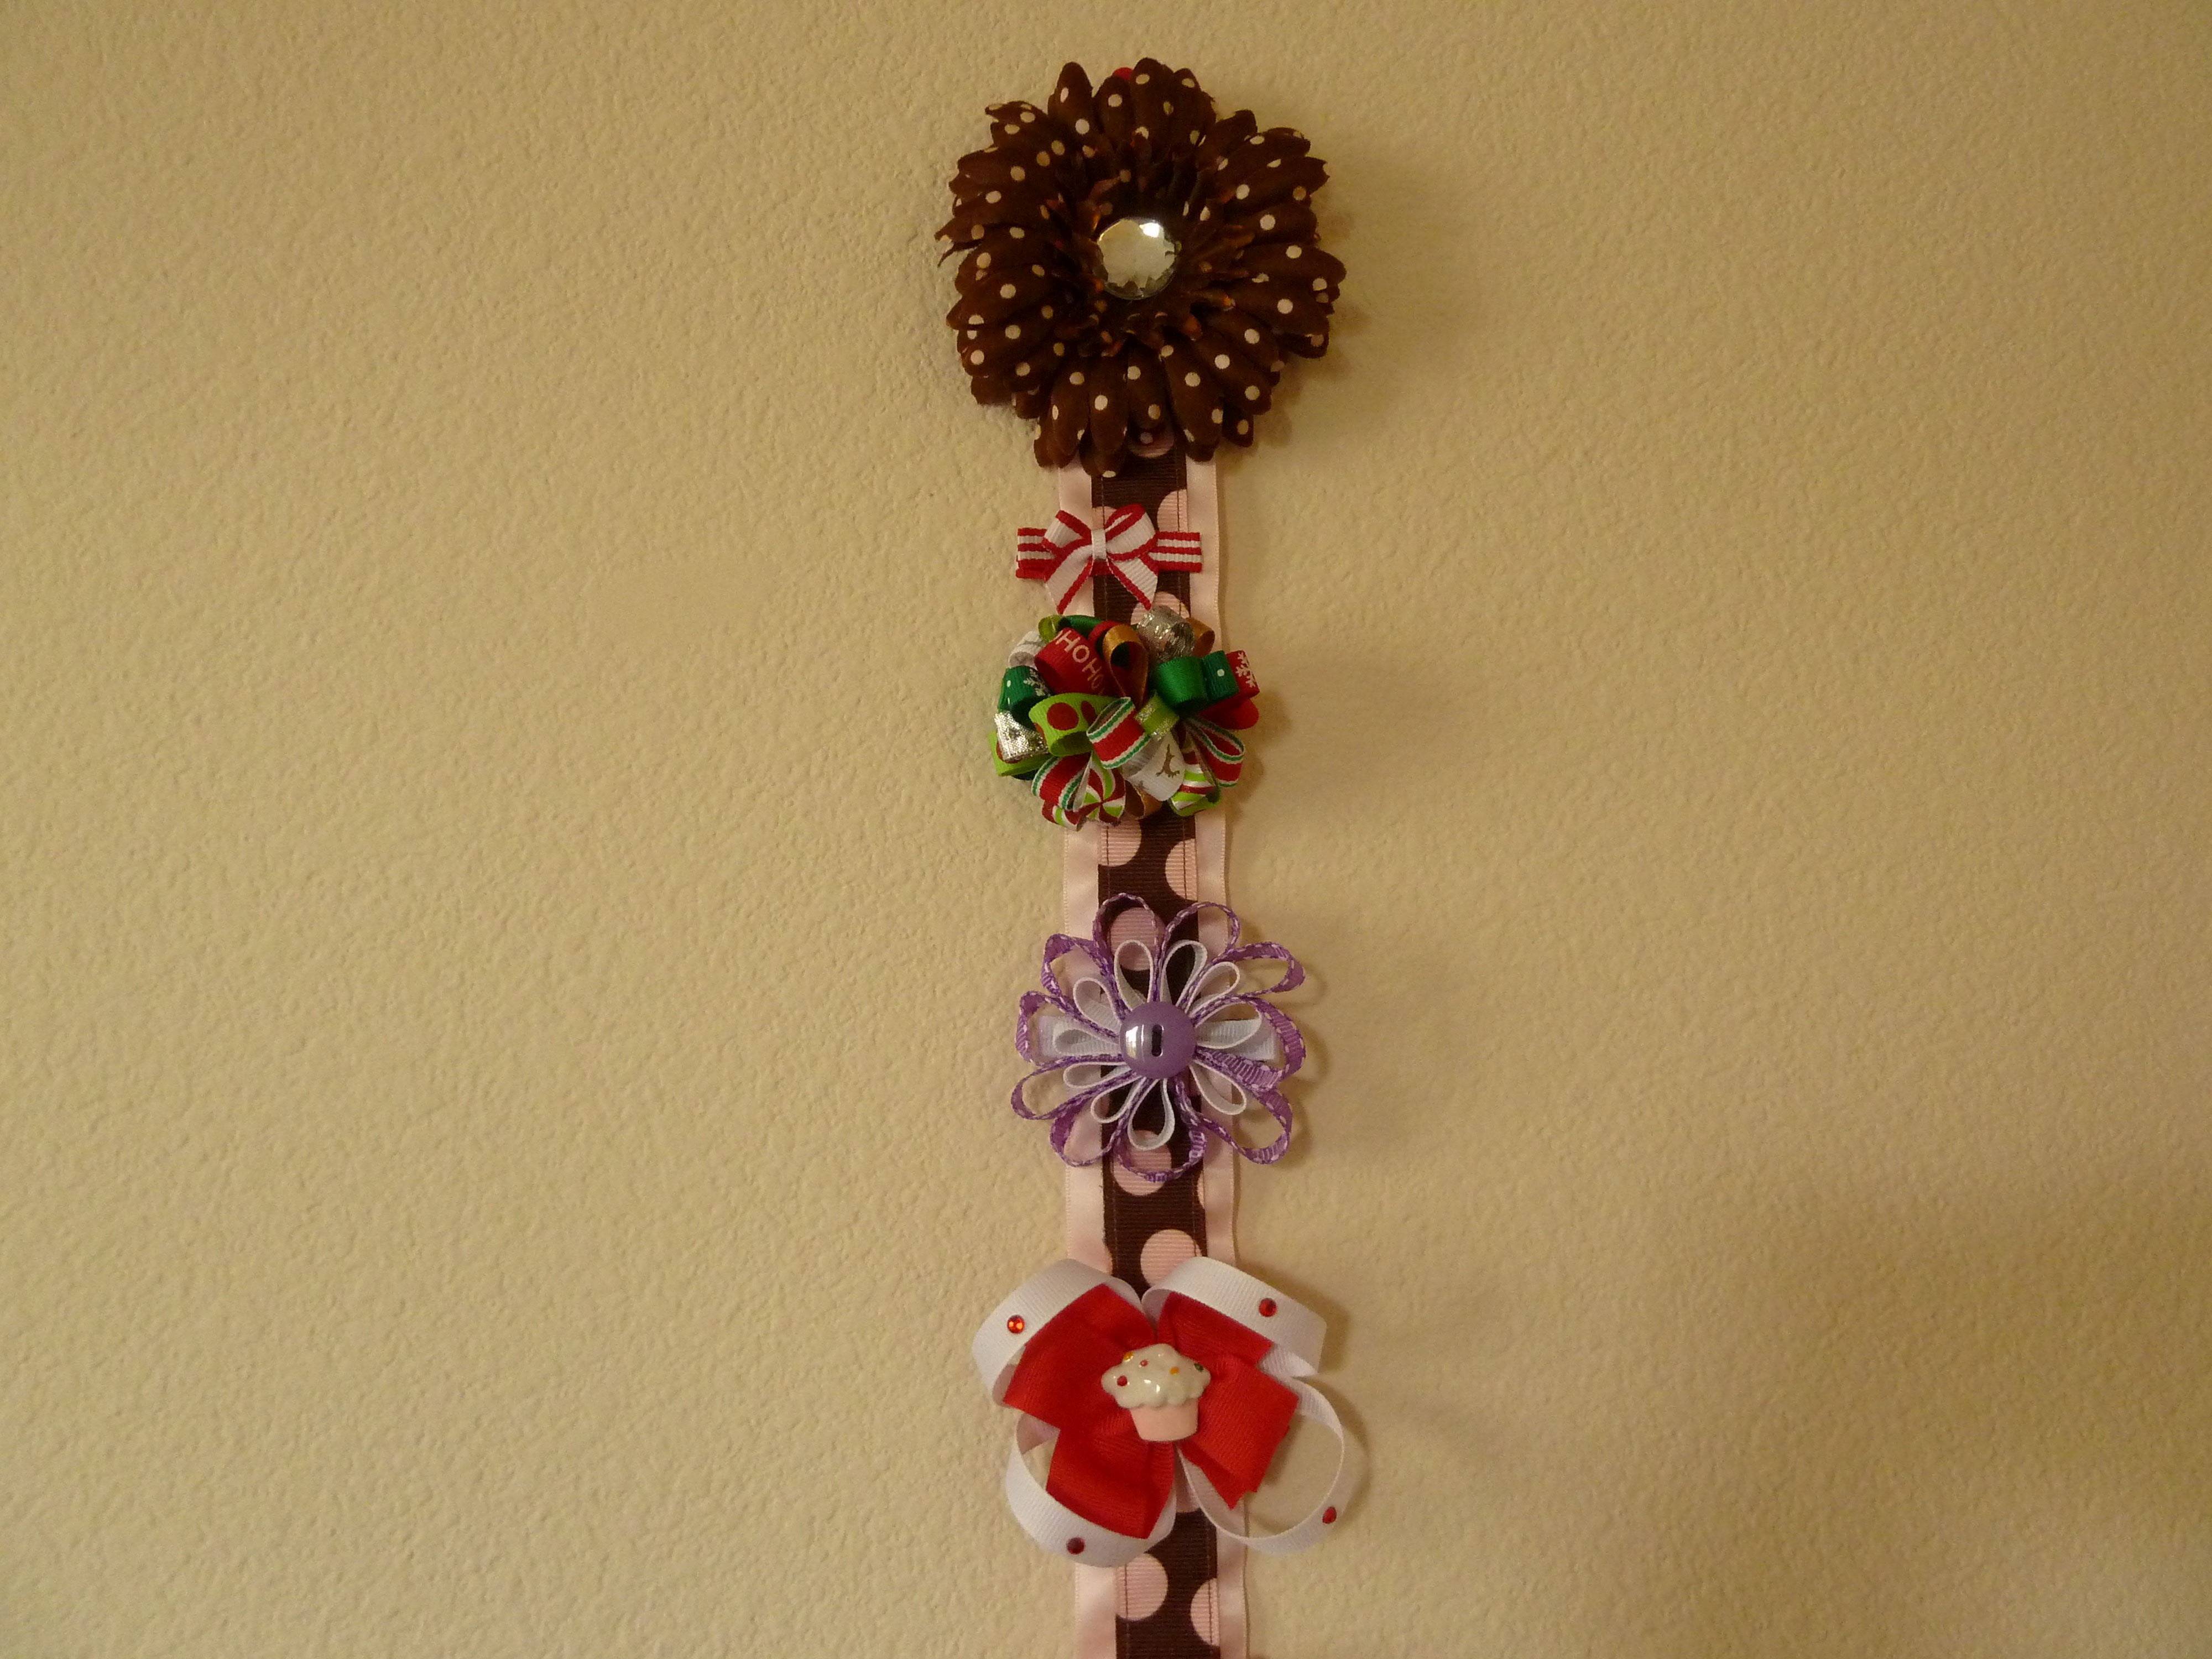
6. Now, “Annie, Get Your Glue Gun.” (Pardon my musical theater reference. I couldn’t resist). Warm up your hot glue gun and glue the ribbon RIGHT SIDE DOWN on back of flower, also RIGHT SIDE DOWN.
**IMPORTANT: make sure you glue the pony ‘o end of ribbon ABOVE the plastic “leaves” of your flower. Otherwise, your bow holder won’t lie flush against your wall or closet door and that’s just plain annoying.
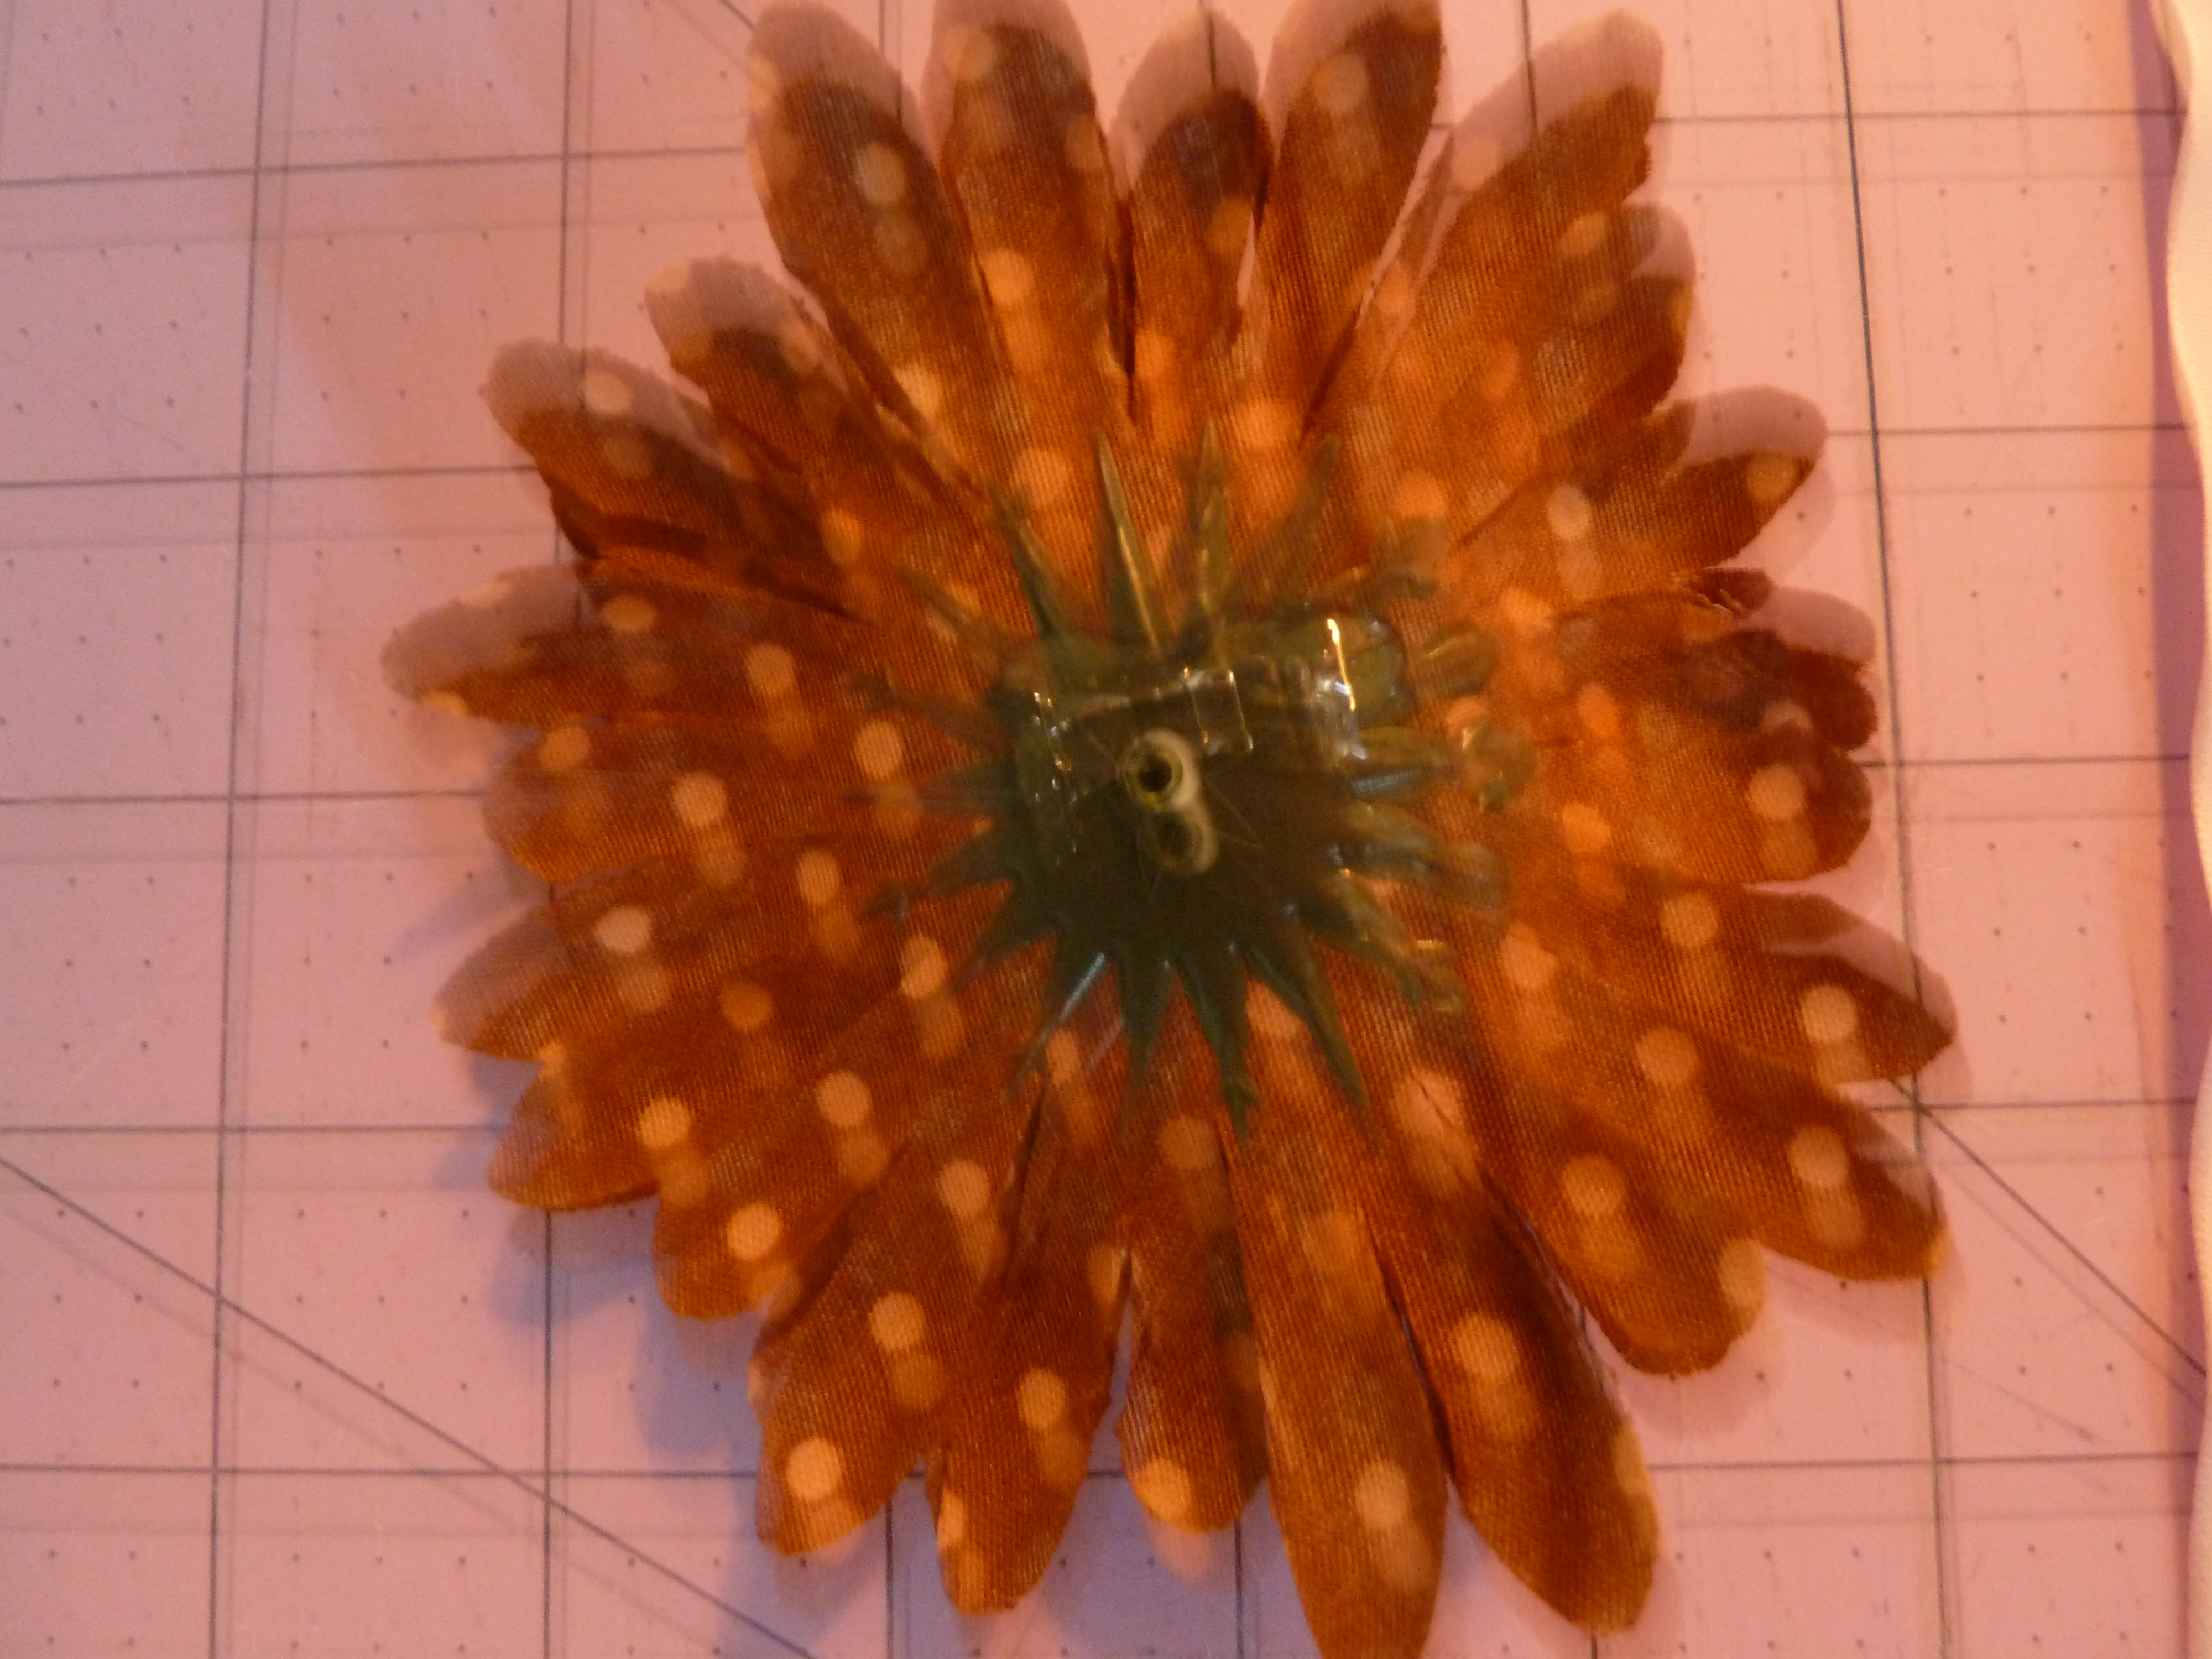
Here’s a horrendously out-of-focus pic of the back of your flower…the “leaves” are green and have the plastic stem start in the center of them.
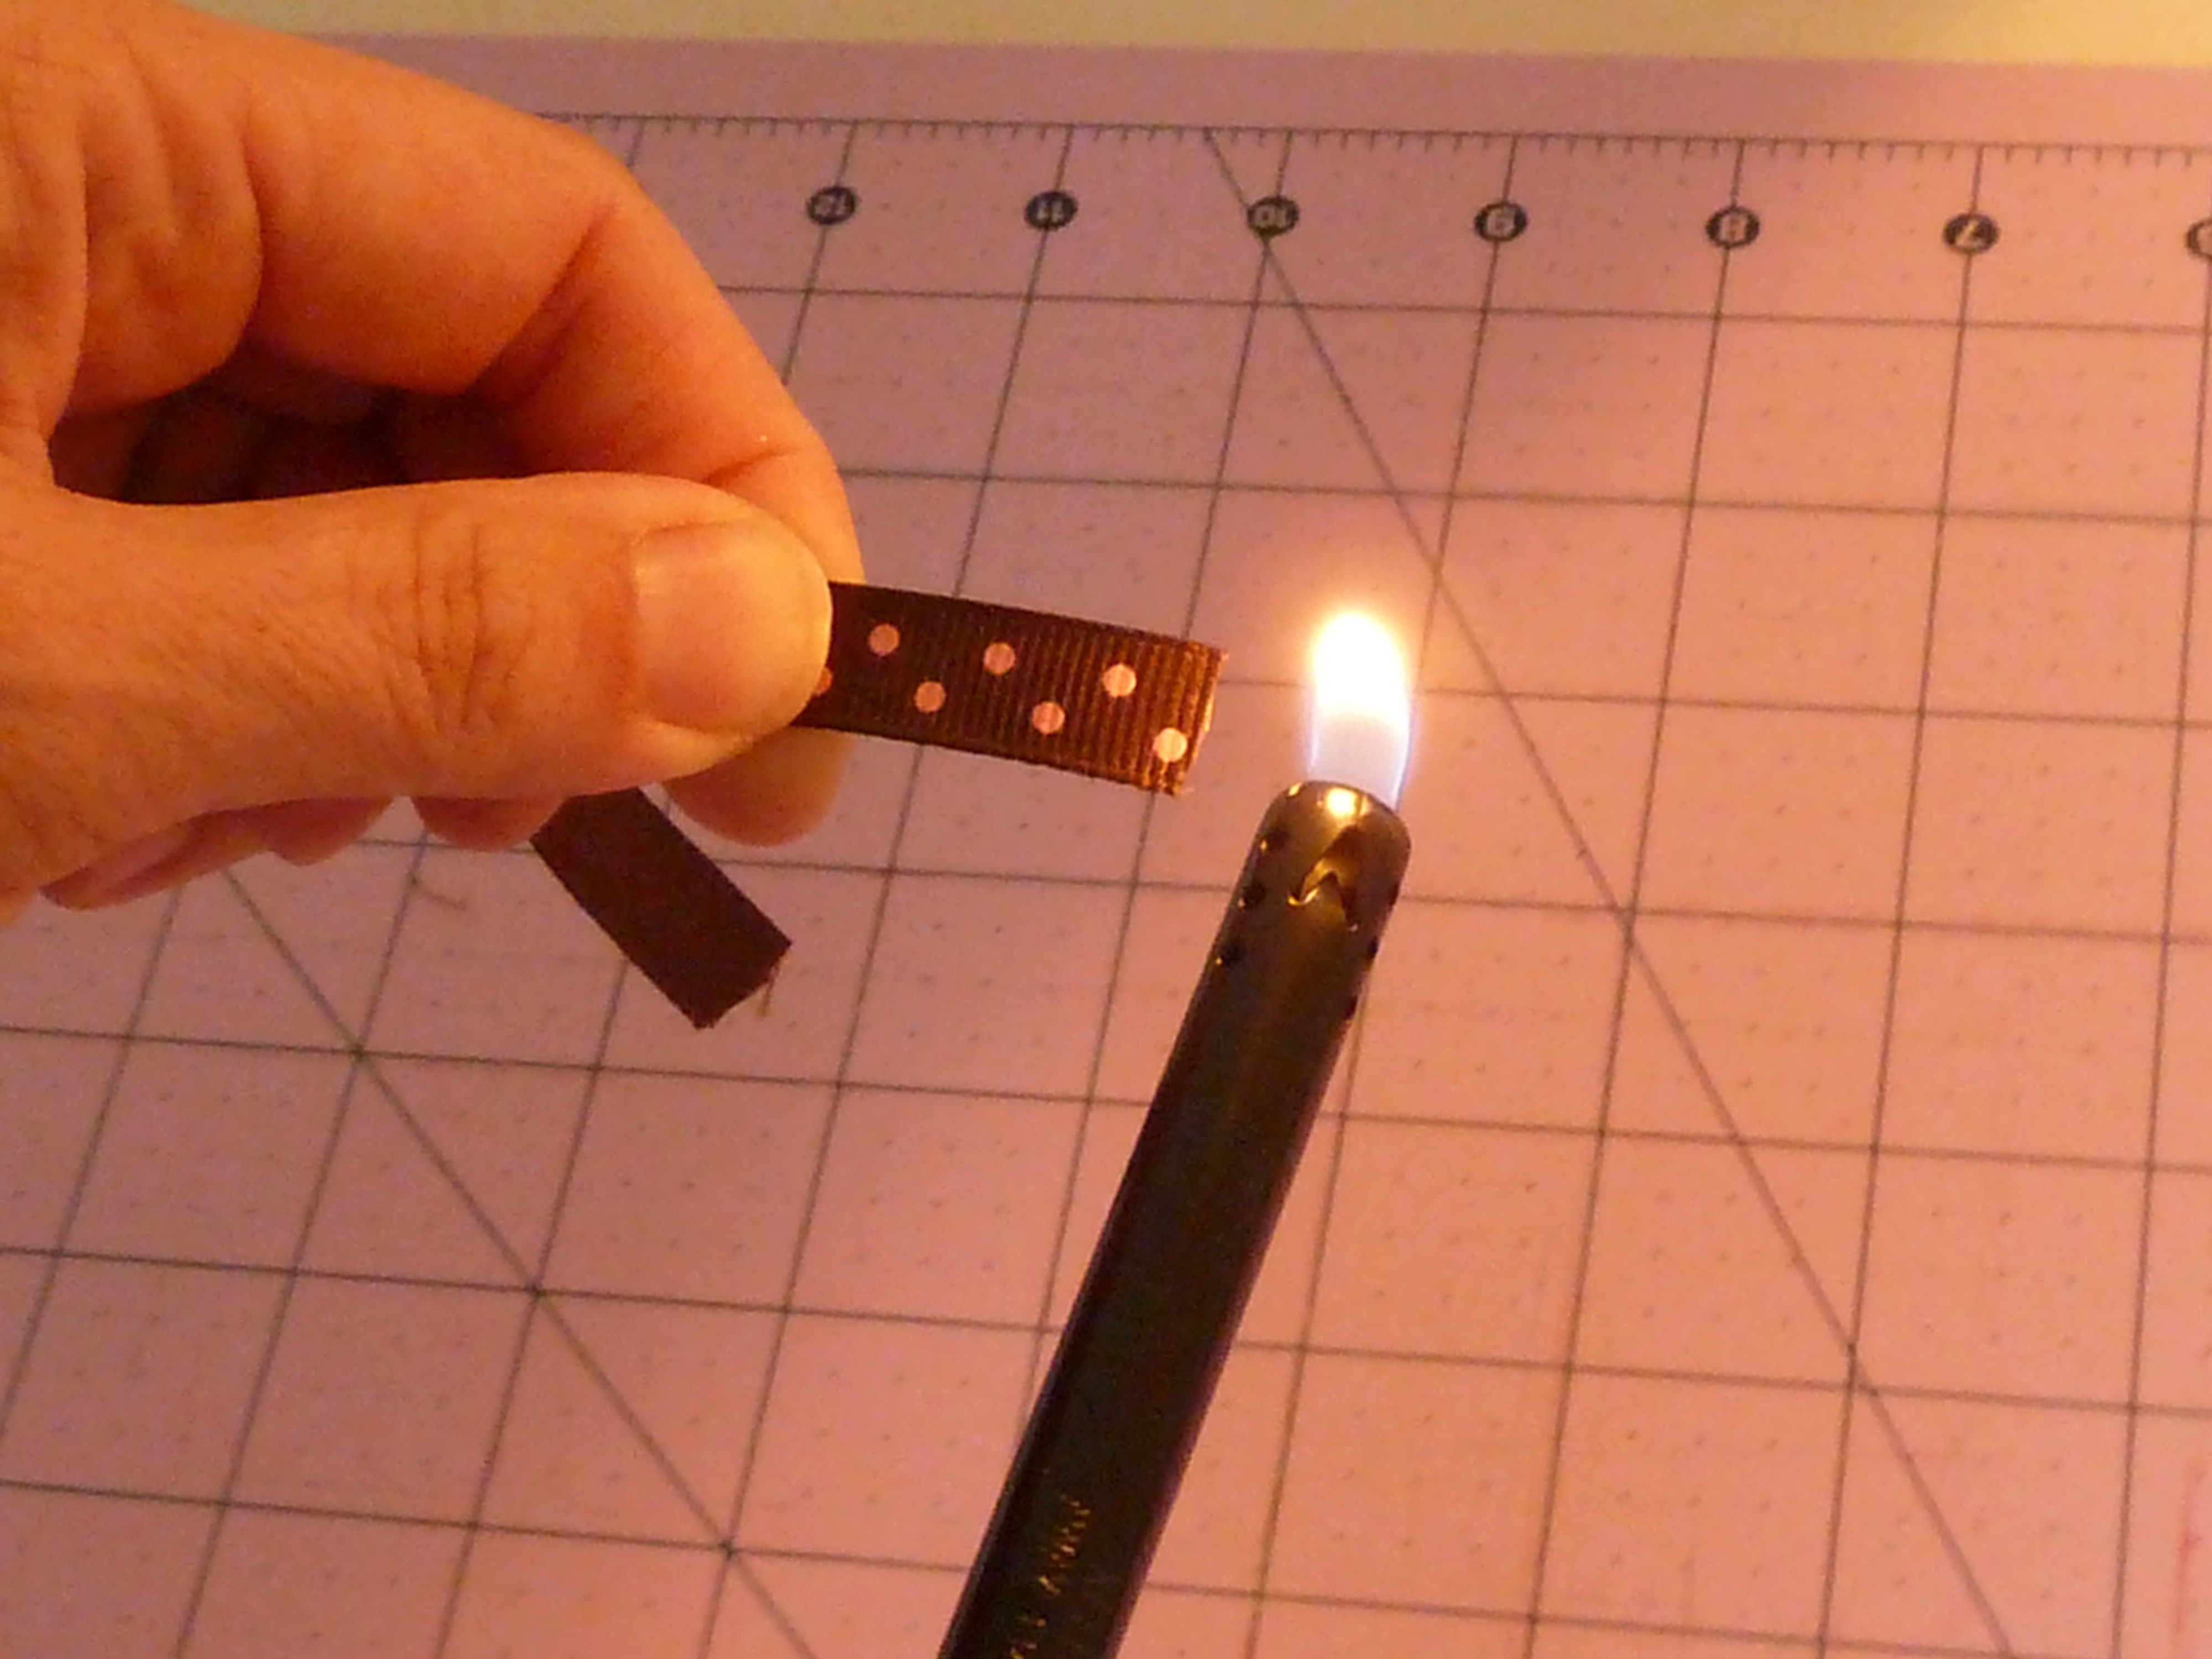
7. Get your lighter. Heat seal the ends of your small piece of accent ribbon so the ends don’t fray. To do this, run the lighter lightly by, but NOT on, your ribbon. When heat sealed, the ribbon ends will feel a little hard and almost carmelized without being burned or singed. If you’ve had three scooby snacks by now, you may find this step a little challenging.
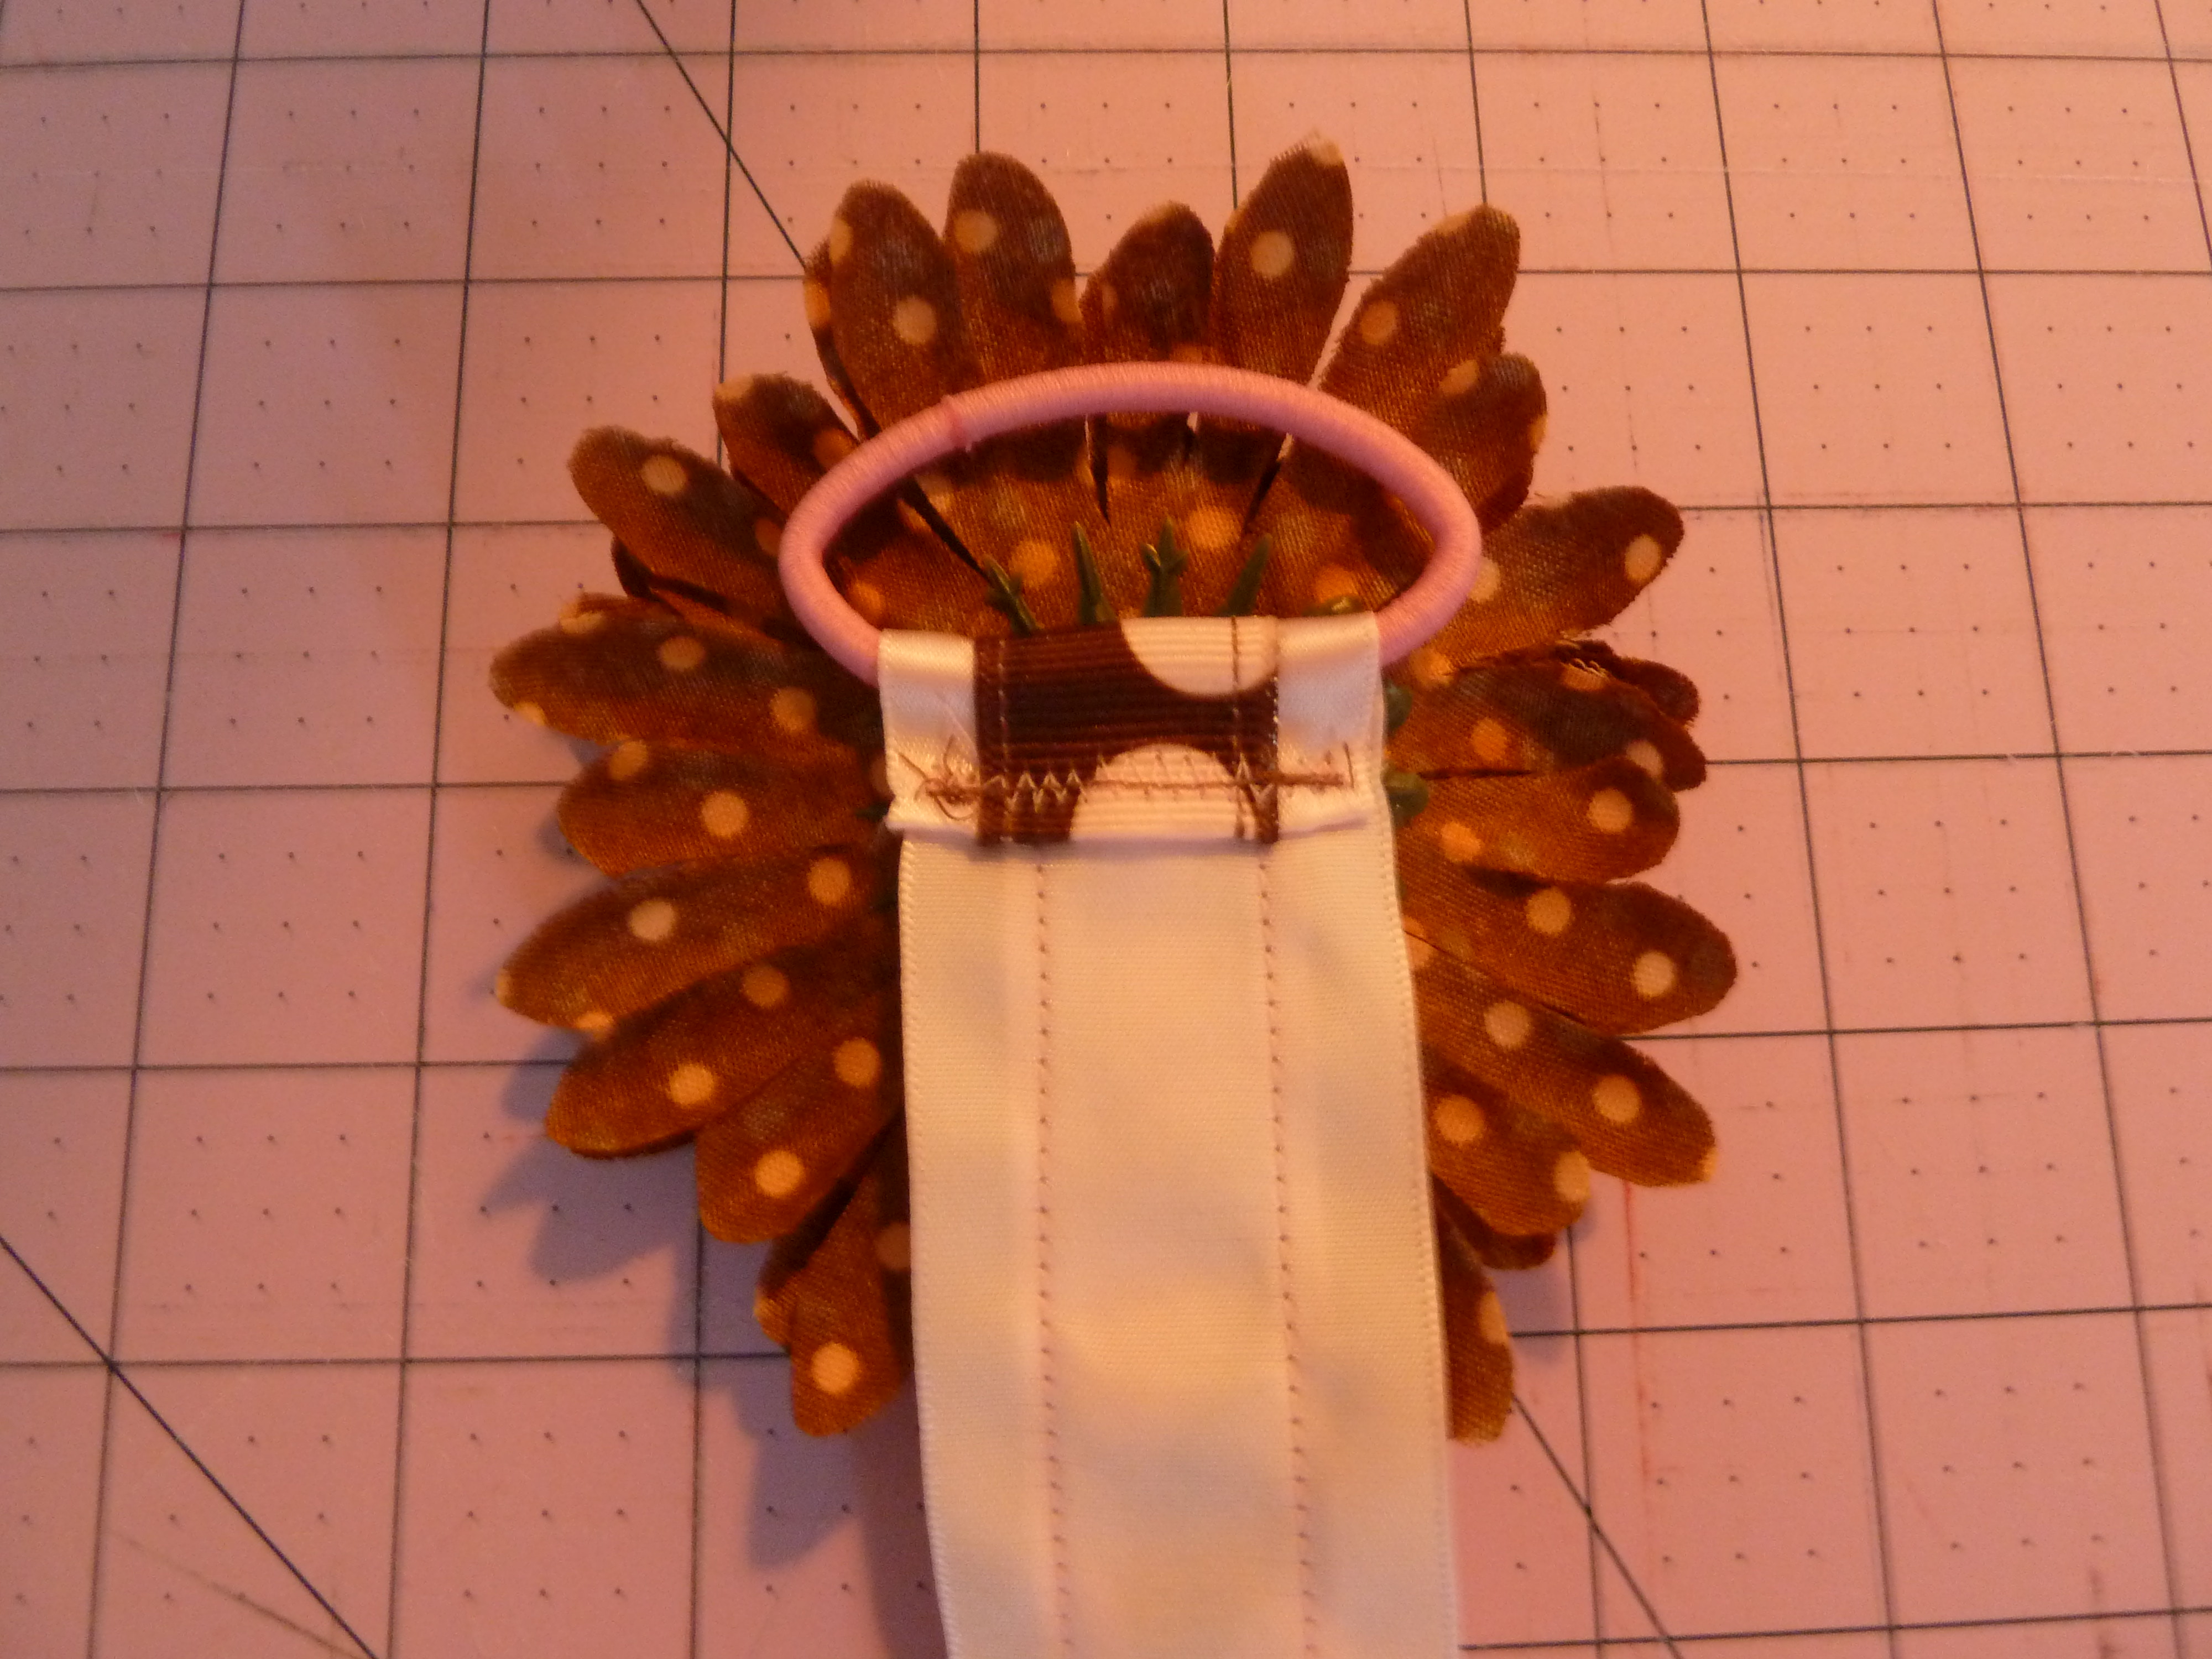
8. Hot glue your short accent ribbon to main ribbon, having ends meet in the back (on the wrong side of the ribbon). You now have a nice accent trim for the bottom of your bow holder.
Use your hot glue gun to run a strip of glue along ribbon…
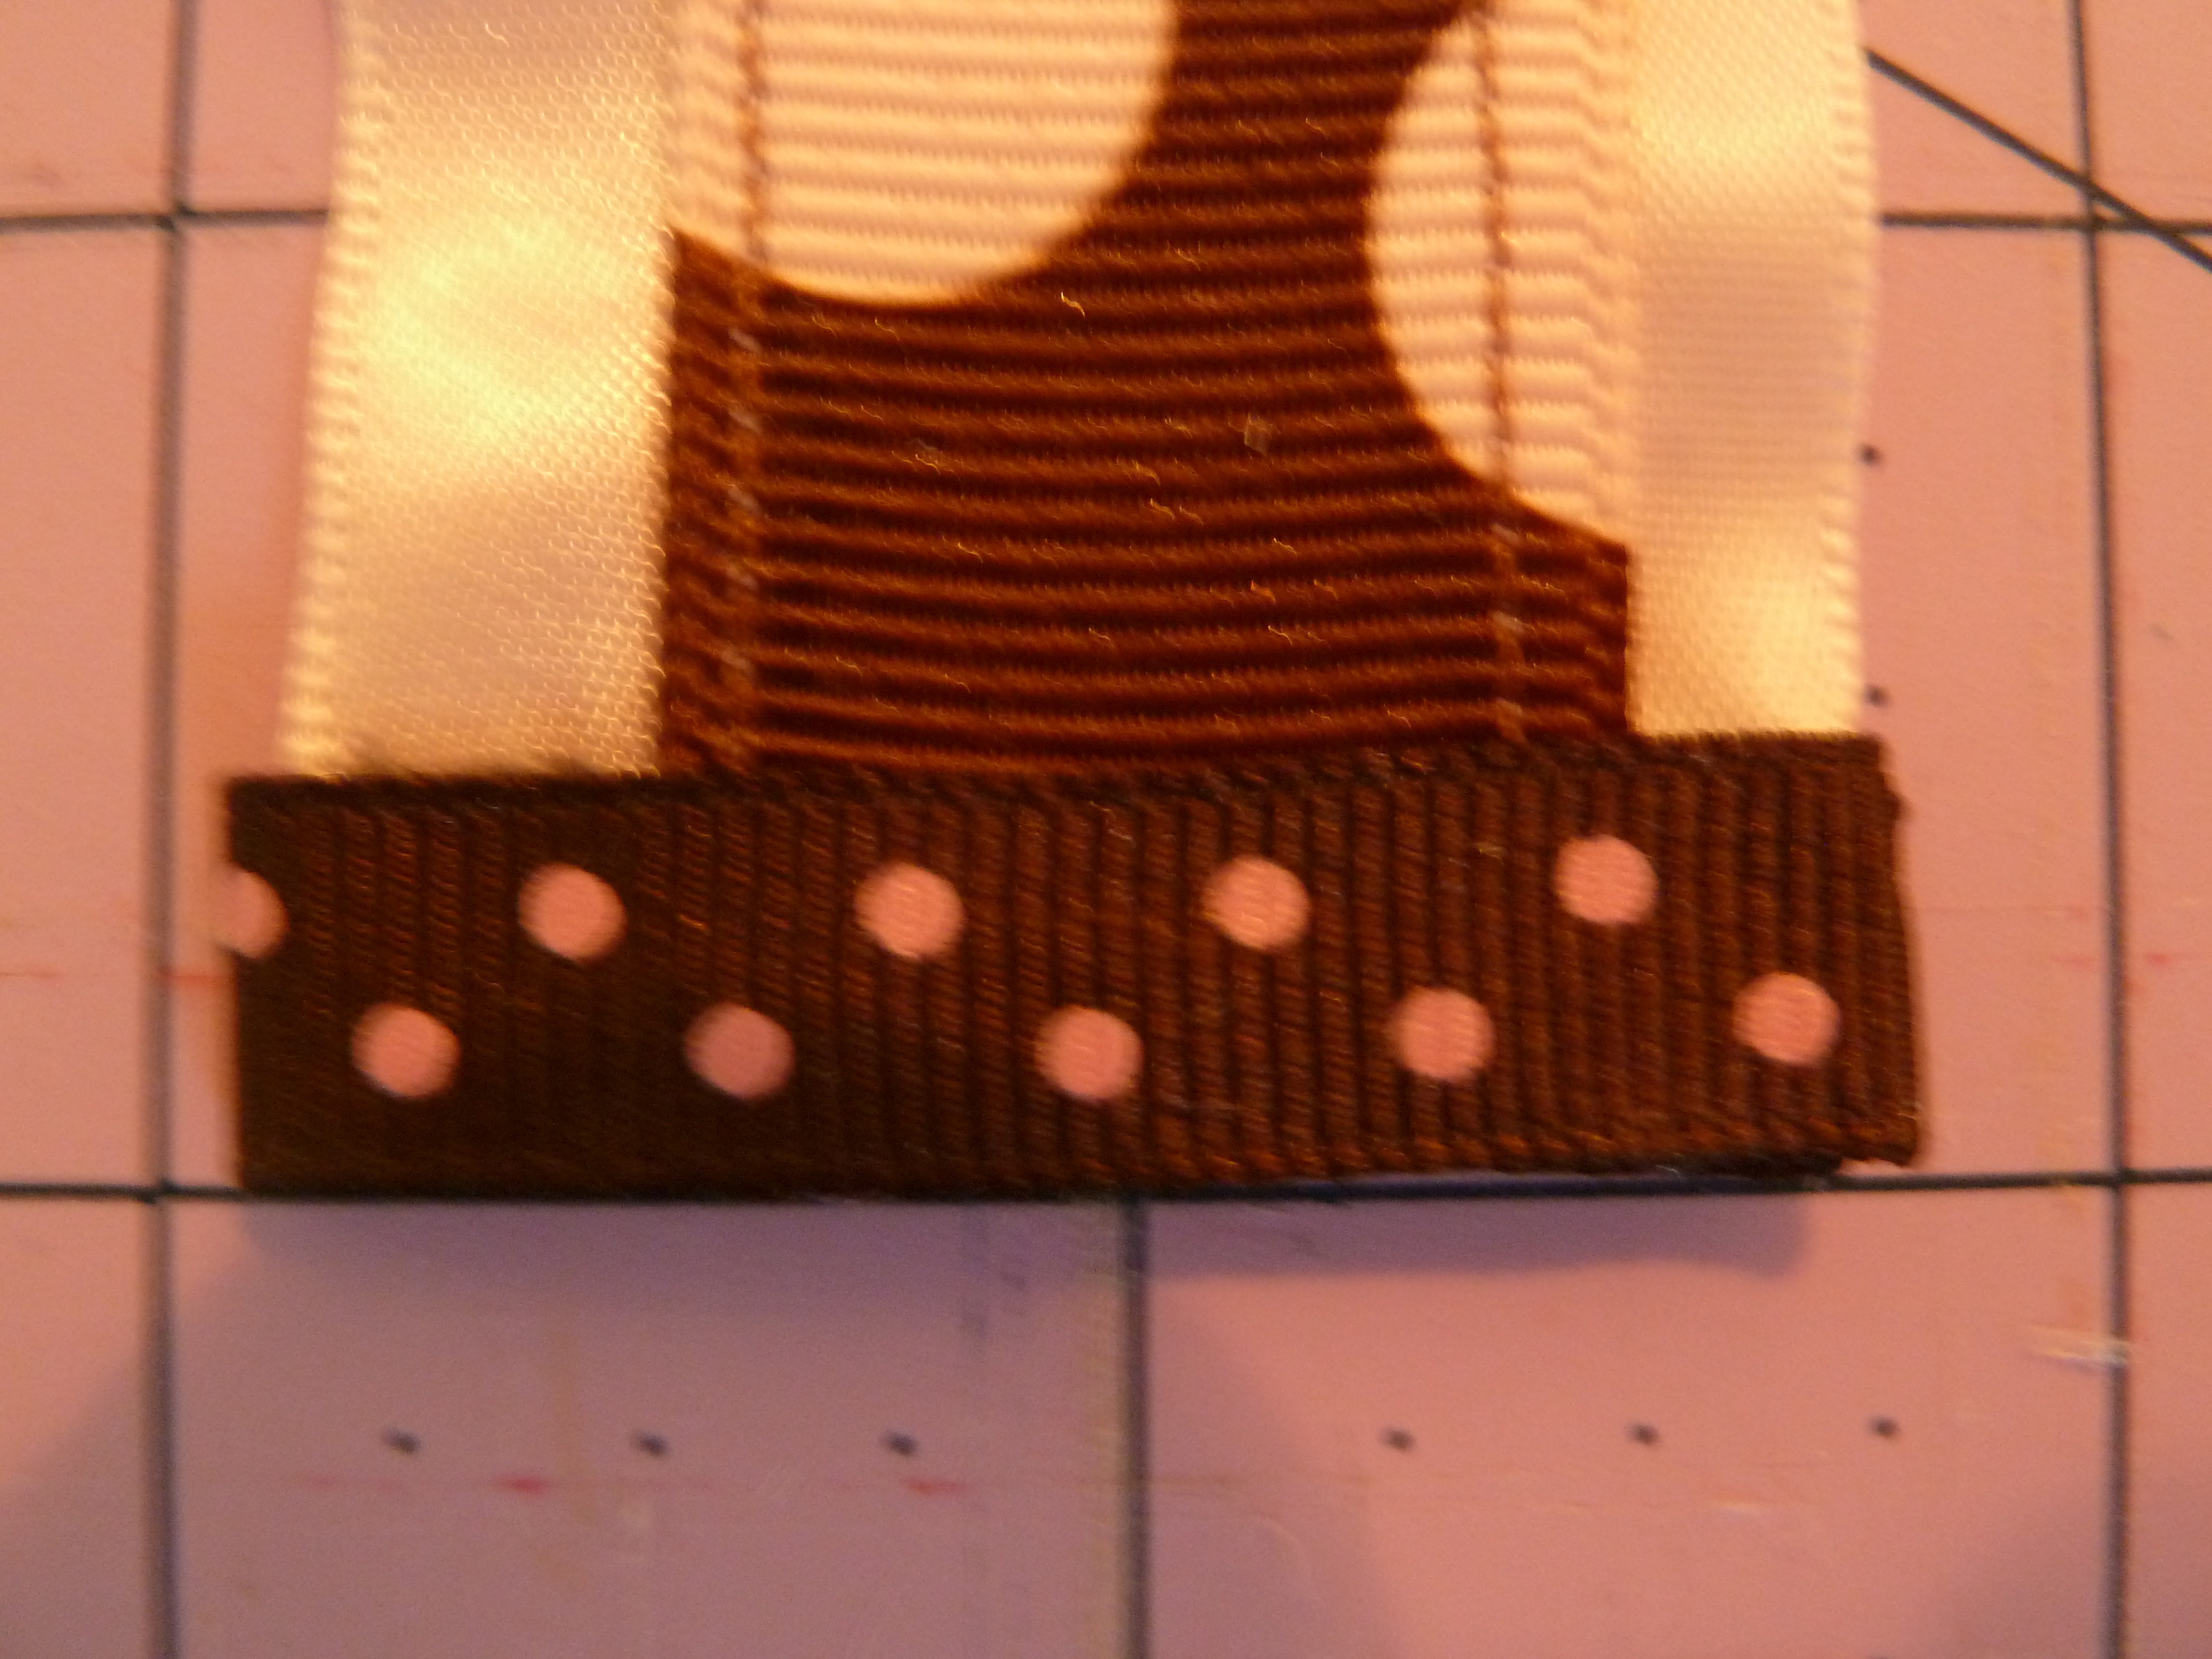
…now quickly but carefully place your short piece of ribbon along glue line and attach at back with glue, too.
9. Hey! Unplug your hot glue gun so you don’t find a messy glob of glue on your table!
10. Hang that sucker and adorn with all the hair clips you found behind the fridge while cleaning.
WOOHOO, YOU’RE DONE! KUDOS TO YOU!
To see more pics of Bow Holders, visit my etsy store, Born To Wear Bows, at https://www.etsy.com/shop/BornToWearBows?ref=si_shop
